Do you like natural and best handmade Christmas decorations? Make a beautiful angel from arattan that will breathe a Christmas atmosphere into the whole home.
Instructions for rattan angels
You may have seen the rattan bell manual. Maybe you're weaving bells and decorating your Christmas tree with them. Do you know that you can simply turn a bell into an angel? You can donate angels as a little attention, put them on the windowsill, hang them on the tree, but they also decorate the windows nicely. We have prepared instructions for the whole angel - the foundation is the bell, which you will complete with wings and a head.
Instructions for angels
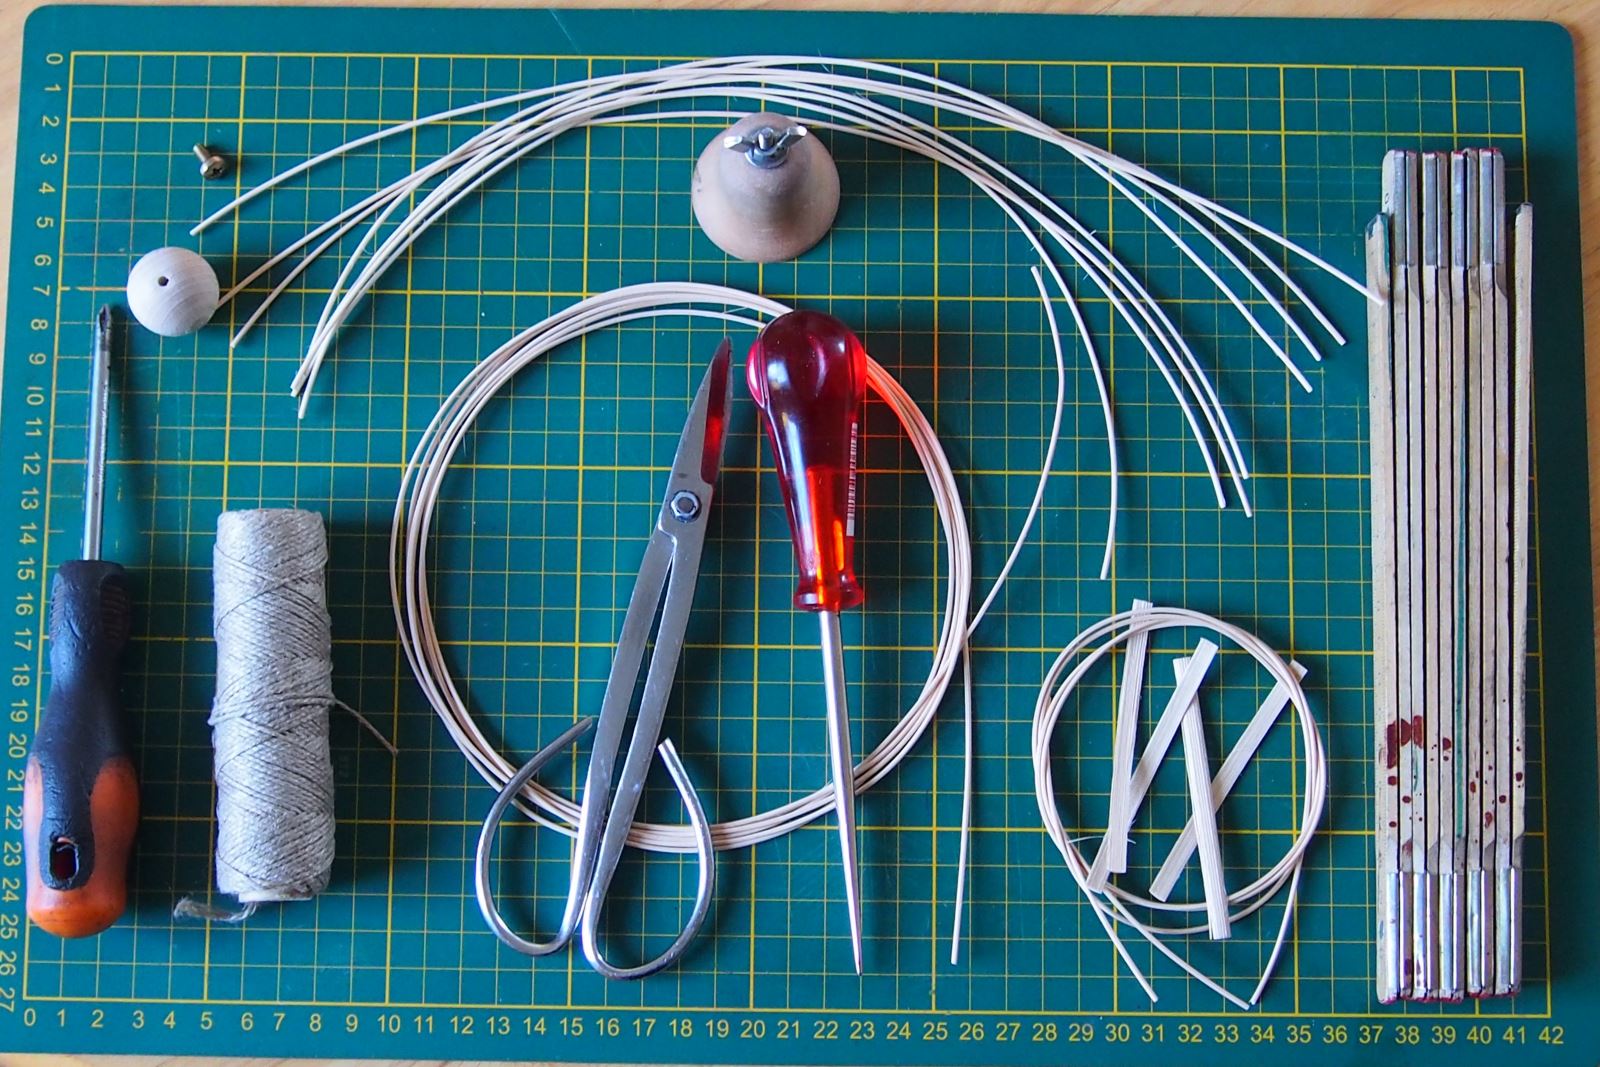
You will need:
-
8 pcs of rattan 1.5 mm long approx. 35 cm
-
round rattan 1.5 mm – long rod for braiding, shorter pieces for wings and wreath
-
4 pcs of rattan cane with length of approx. 8 cm
-
wooden ball with hole through 2.5 cm
-
string for hanging
-
screw that fits into the hole of the ball
-
meter, arrow, scissors, screwdriver, glue
-
Bell mould 4.5 cm high
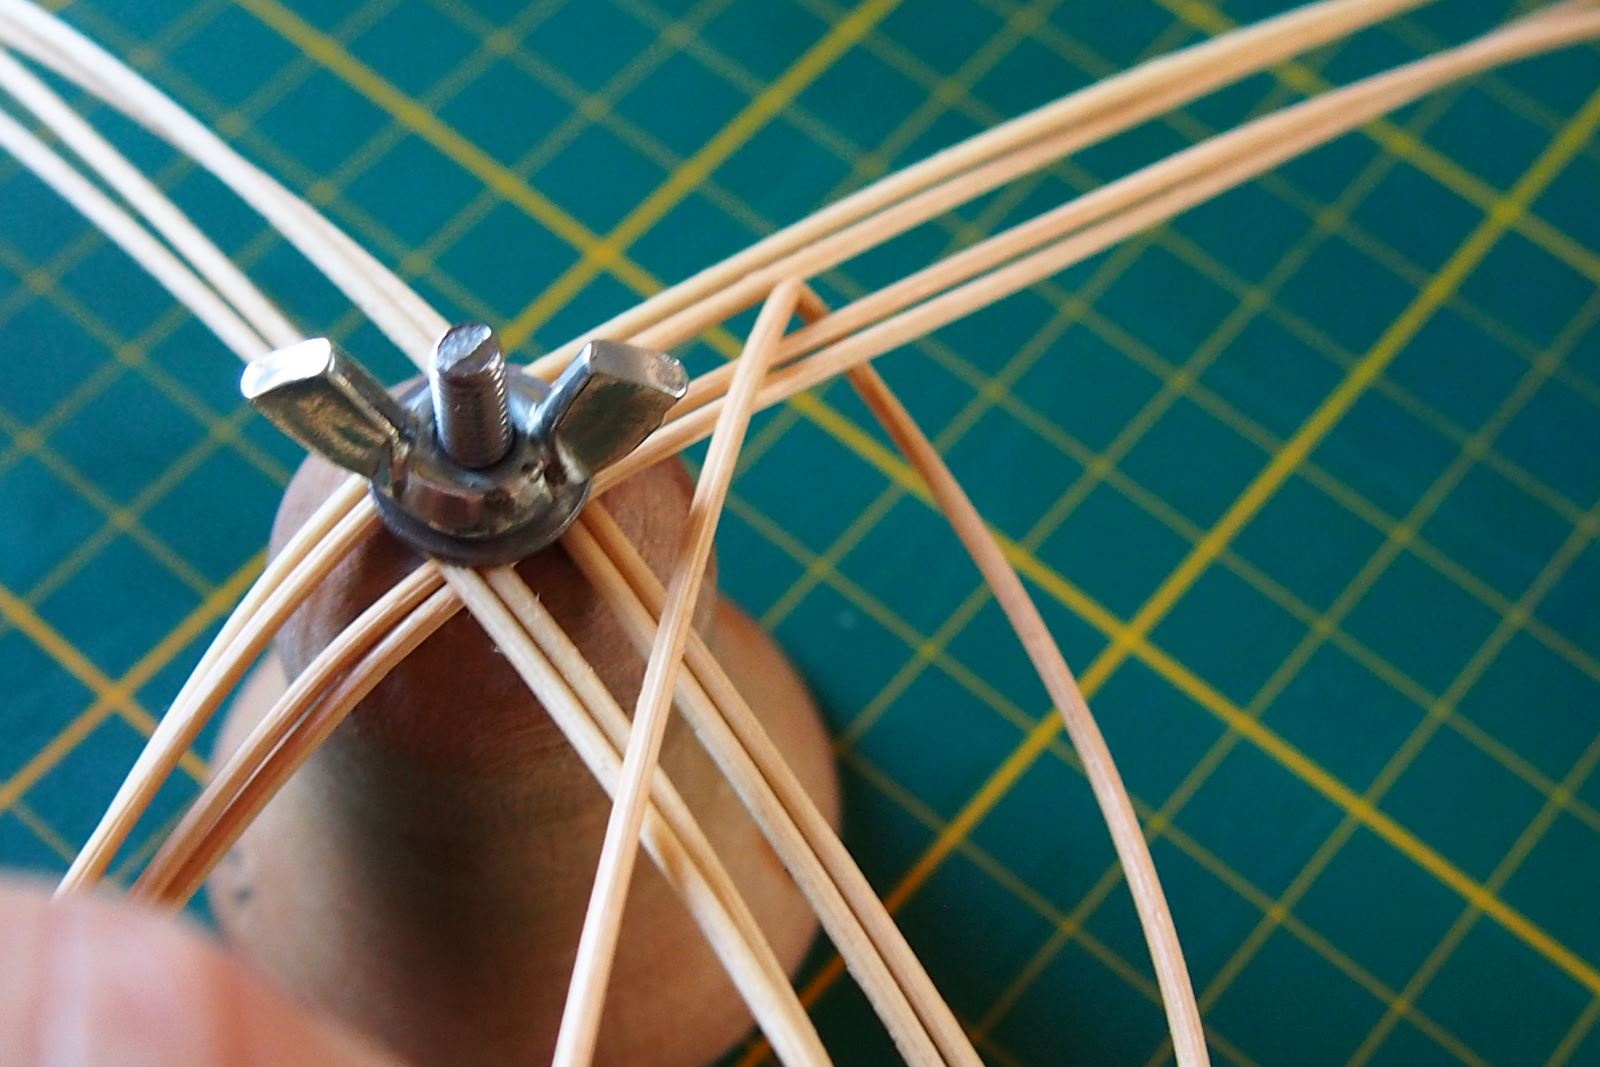
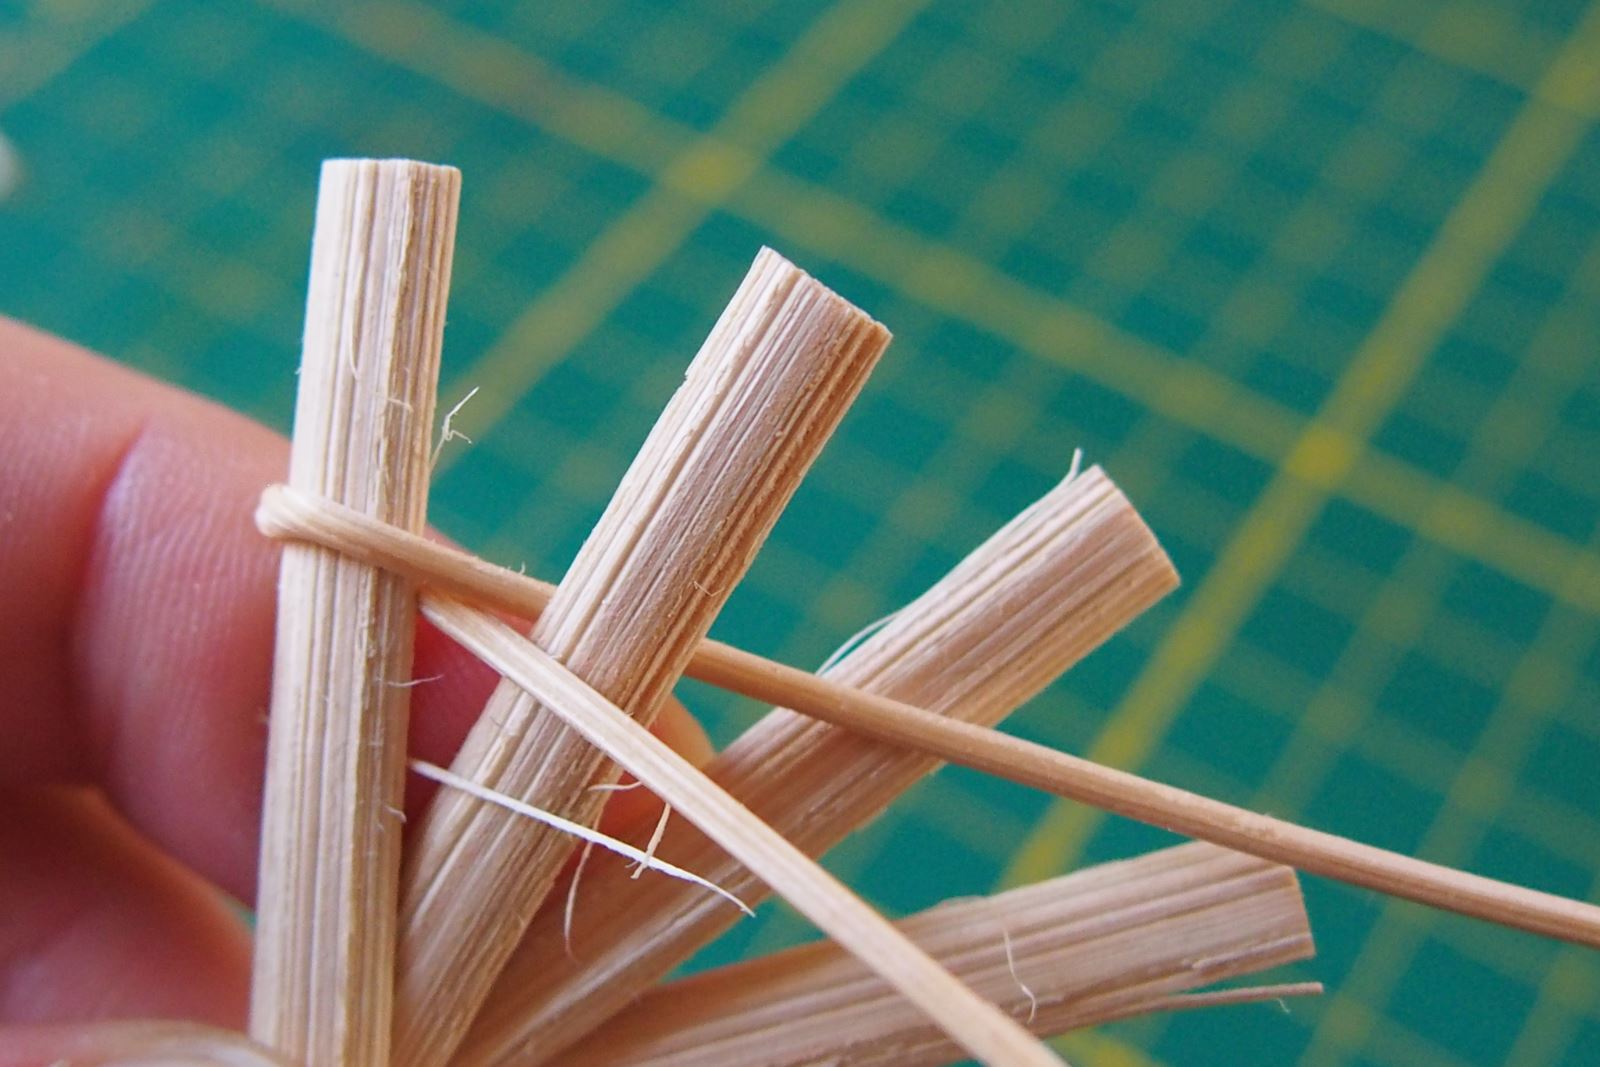
1. Soak all the twigs briefly. Cross 8 pieces of short twigs in the center according to the picture.
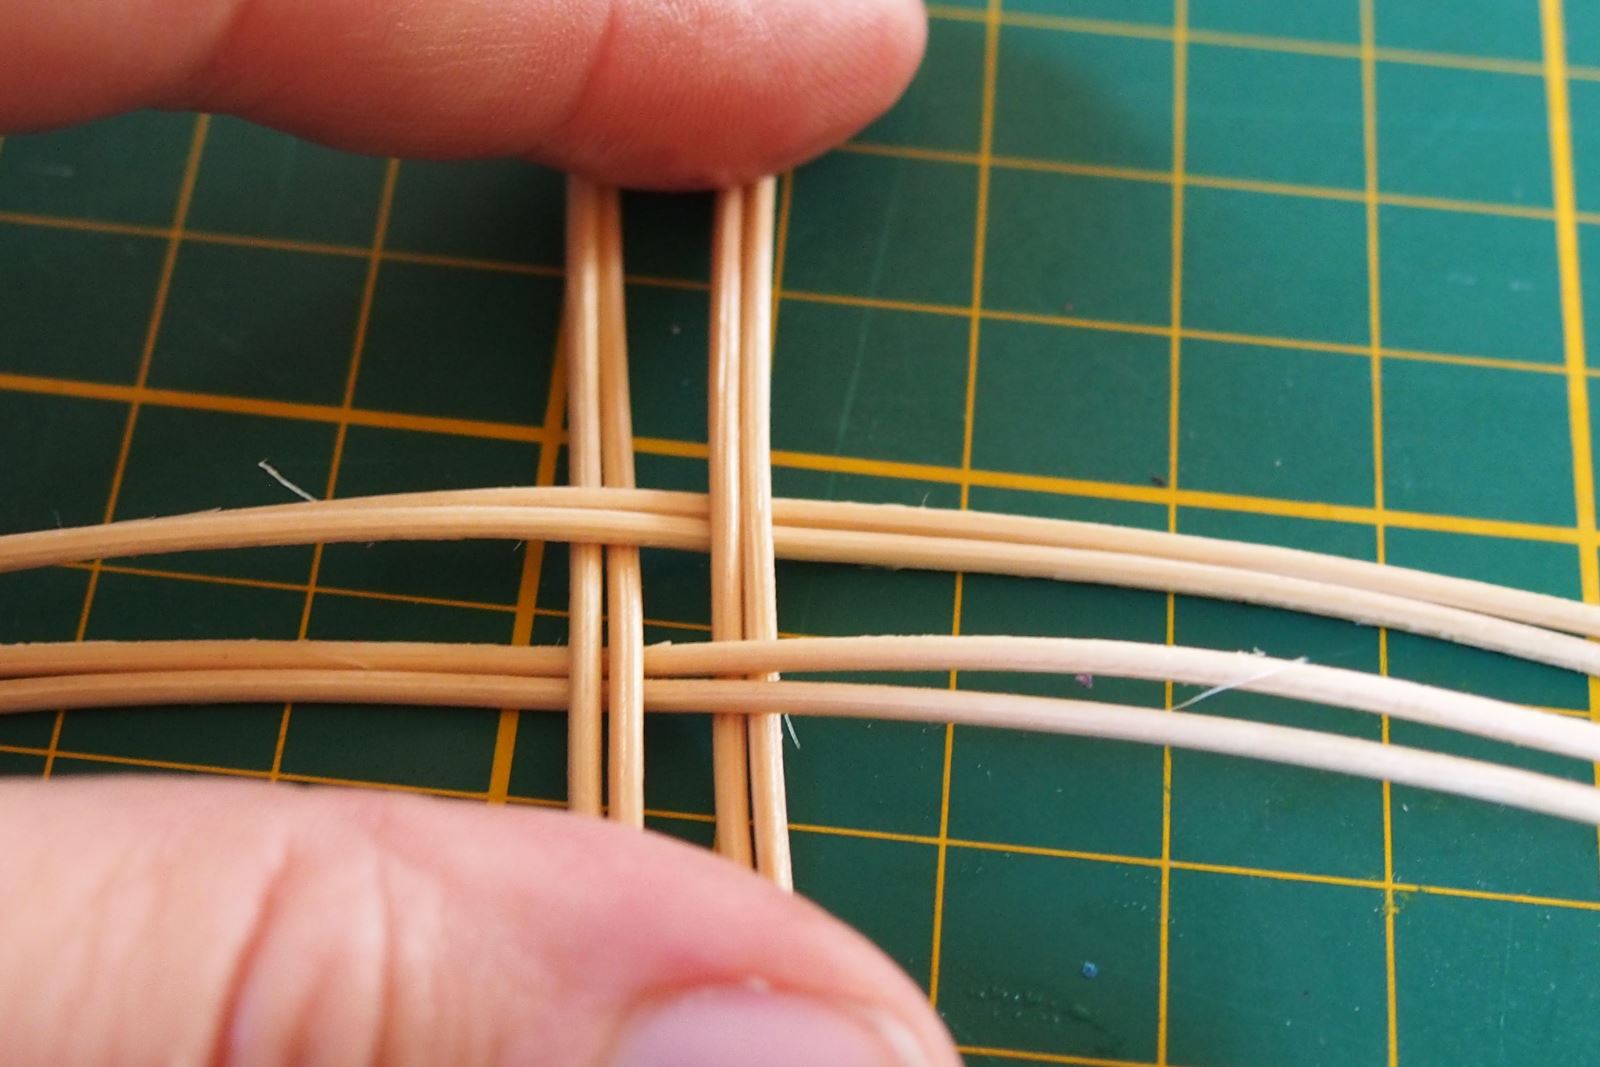
2. Put on the mould, place the mat and tighten.
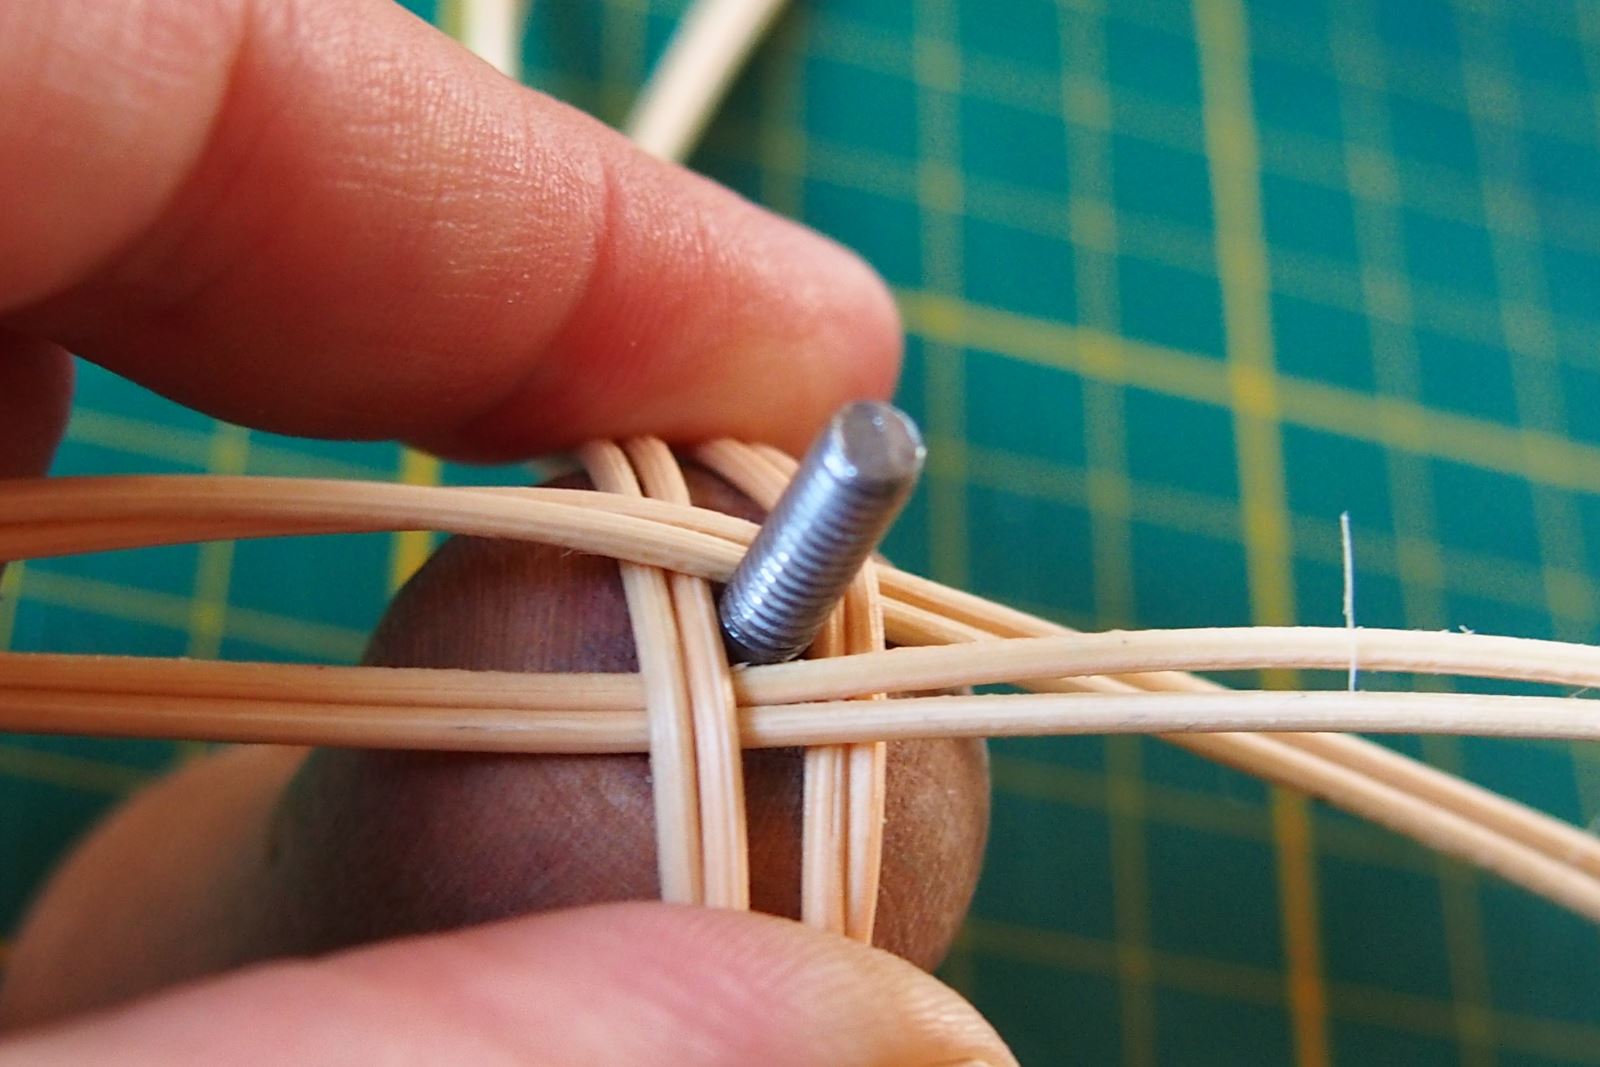
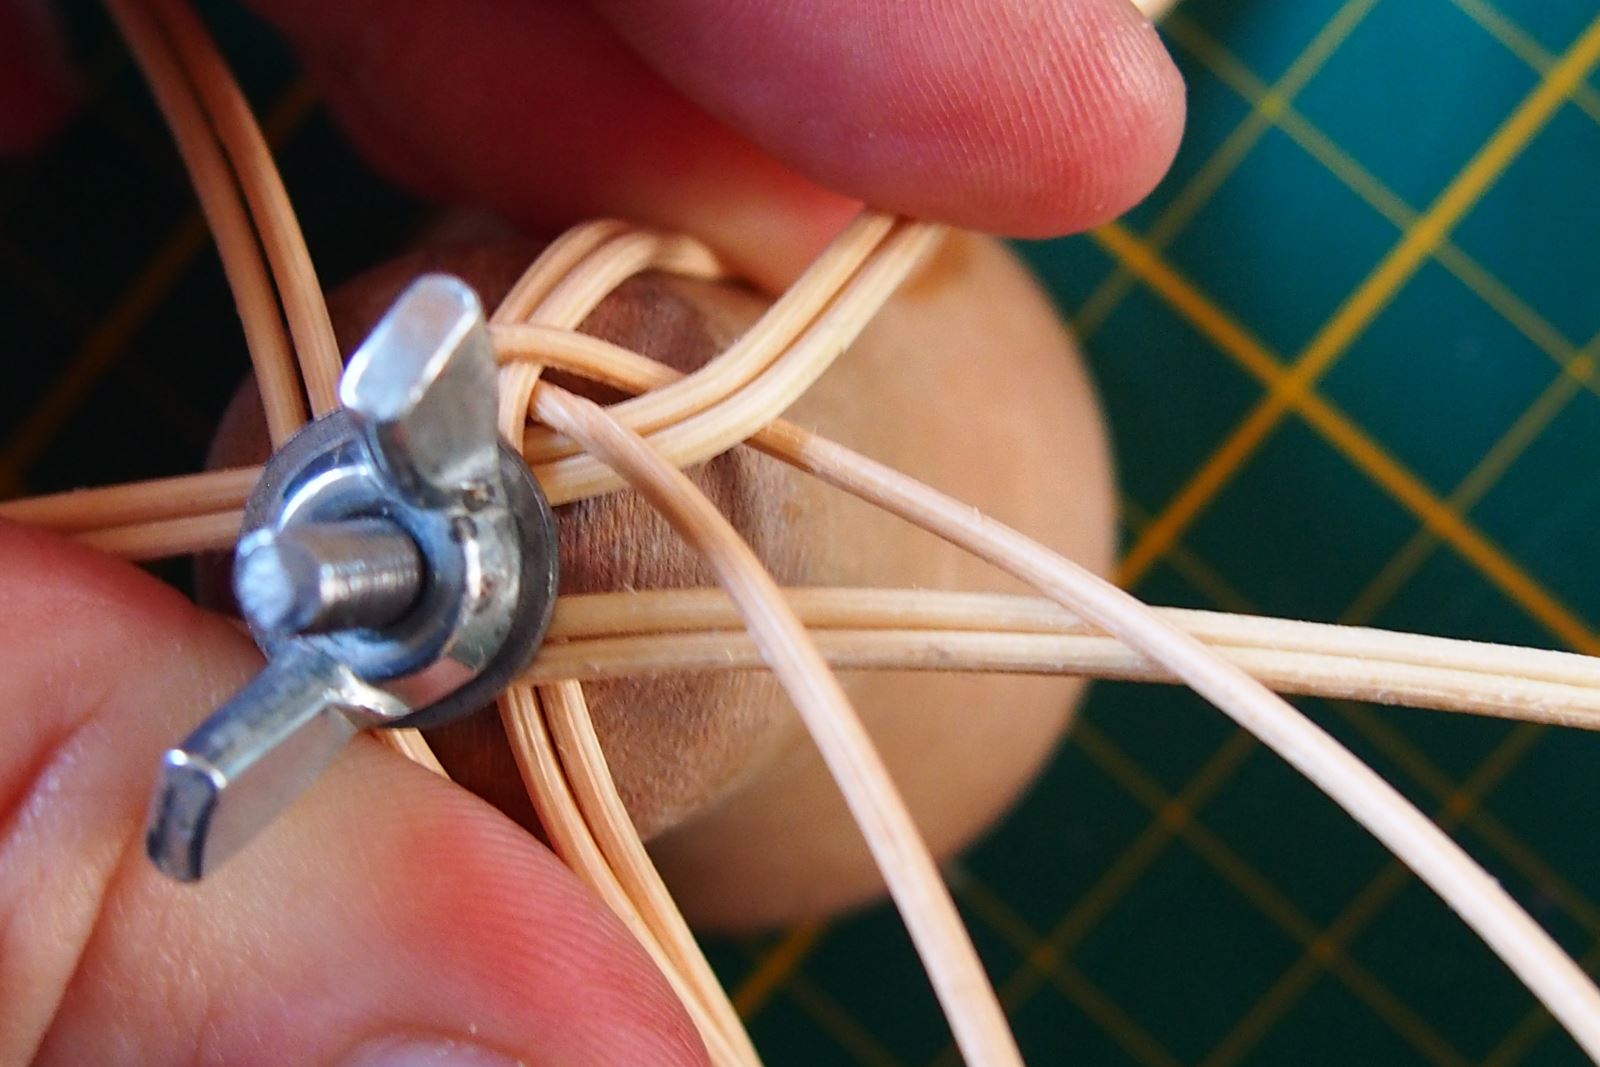
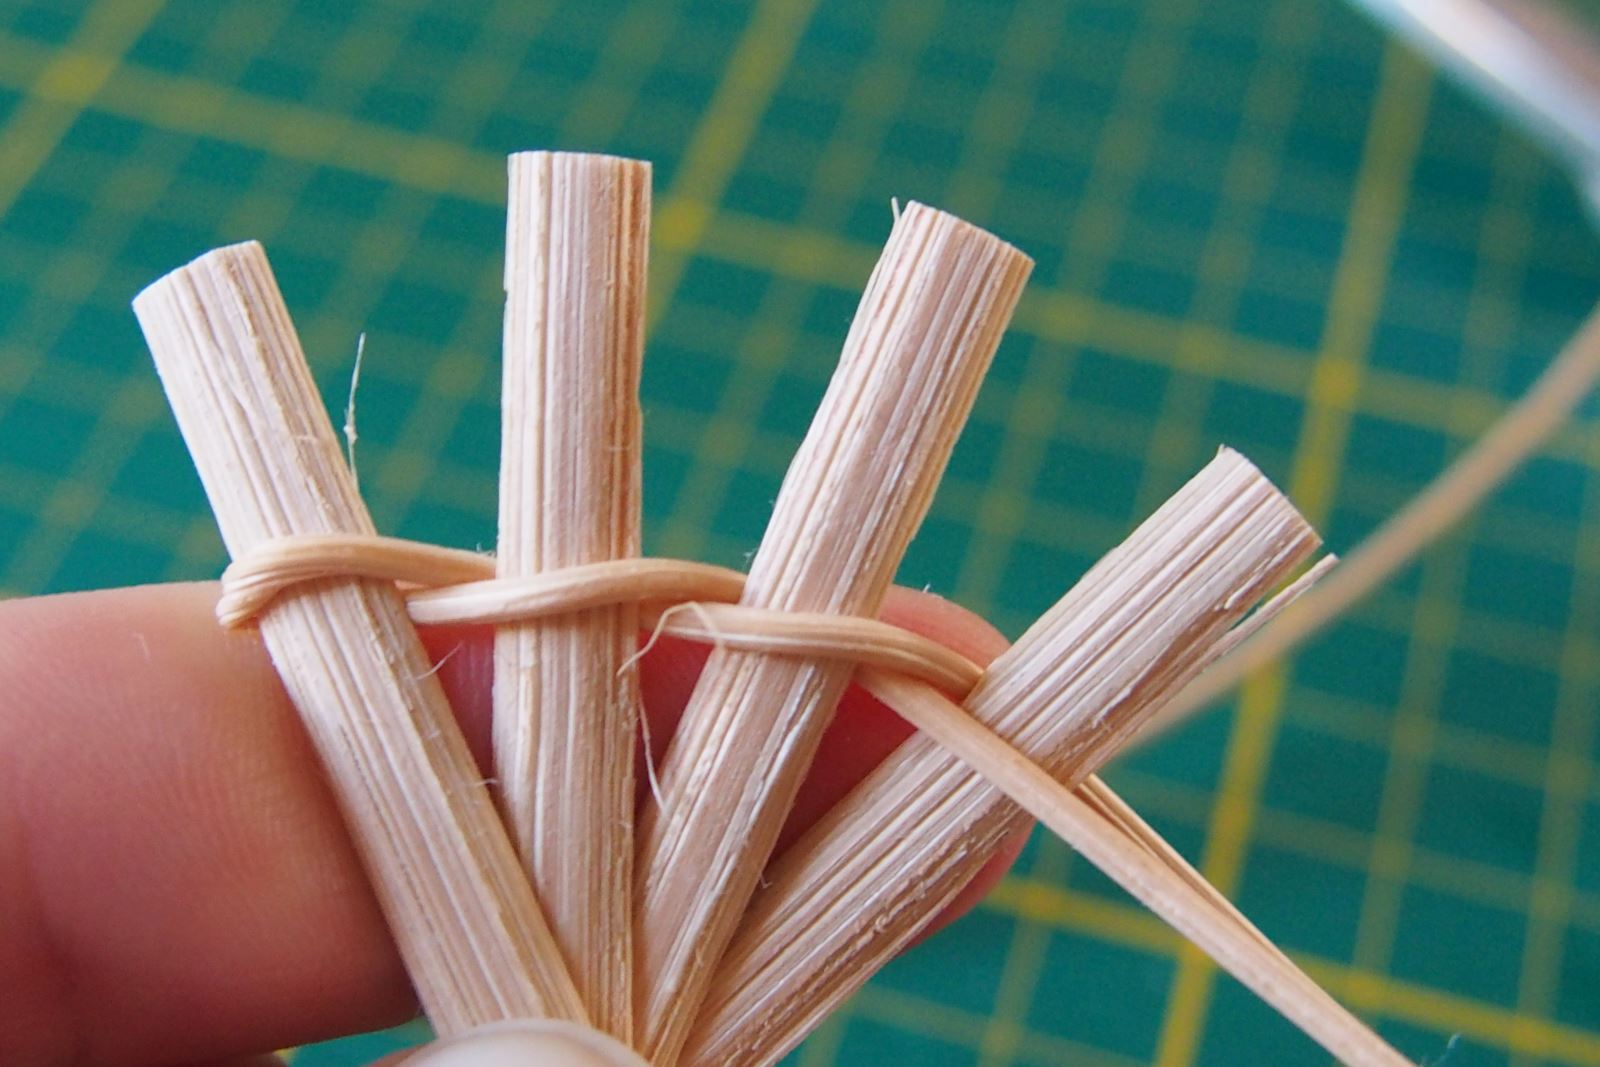
3. Take a long twig and fold it in half. Put on one of the pairs of twigs.
4. Weave the braid in two. Always weave the top wand by leading it under the next pair and up.
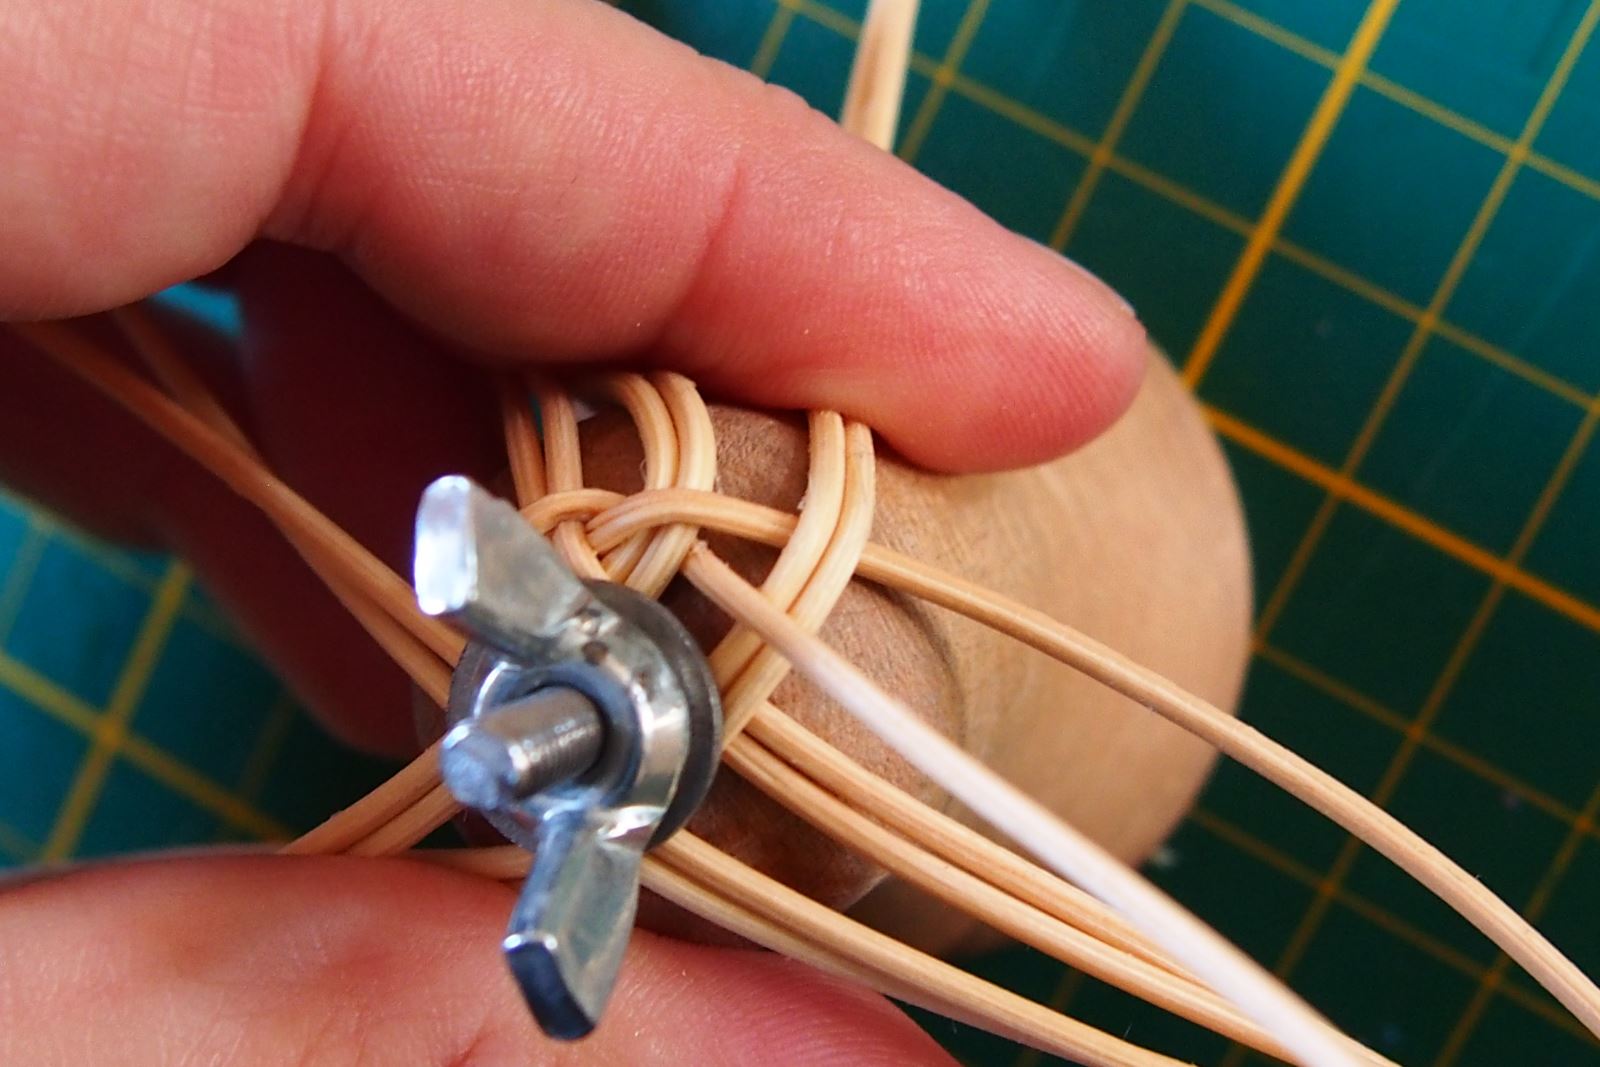
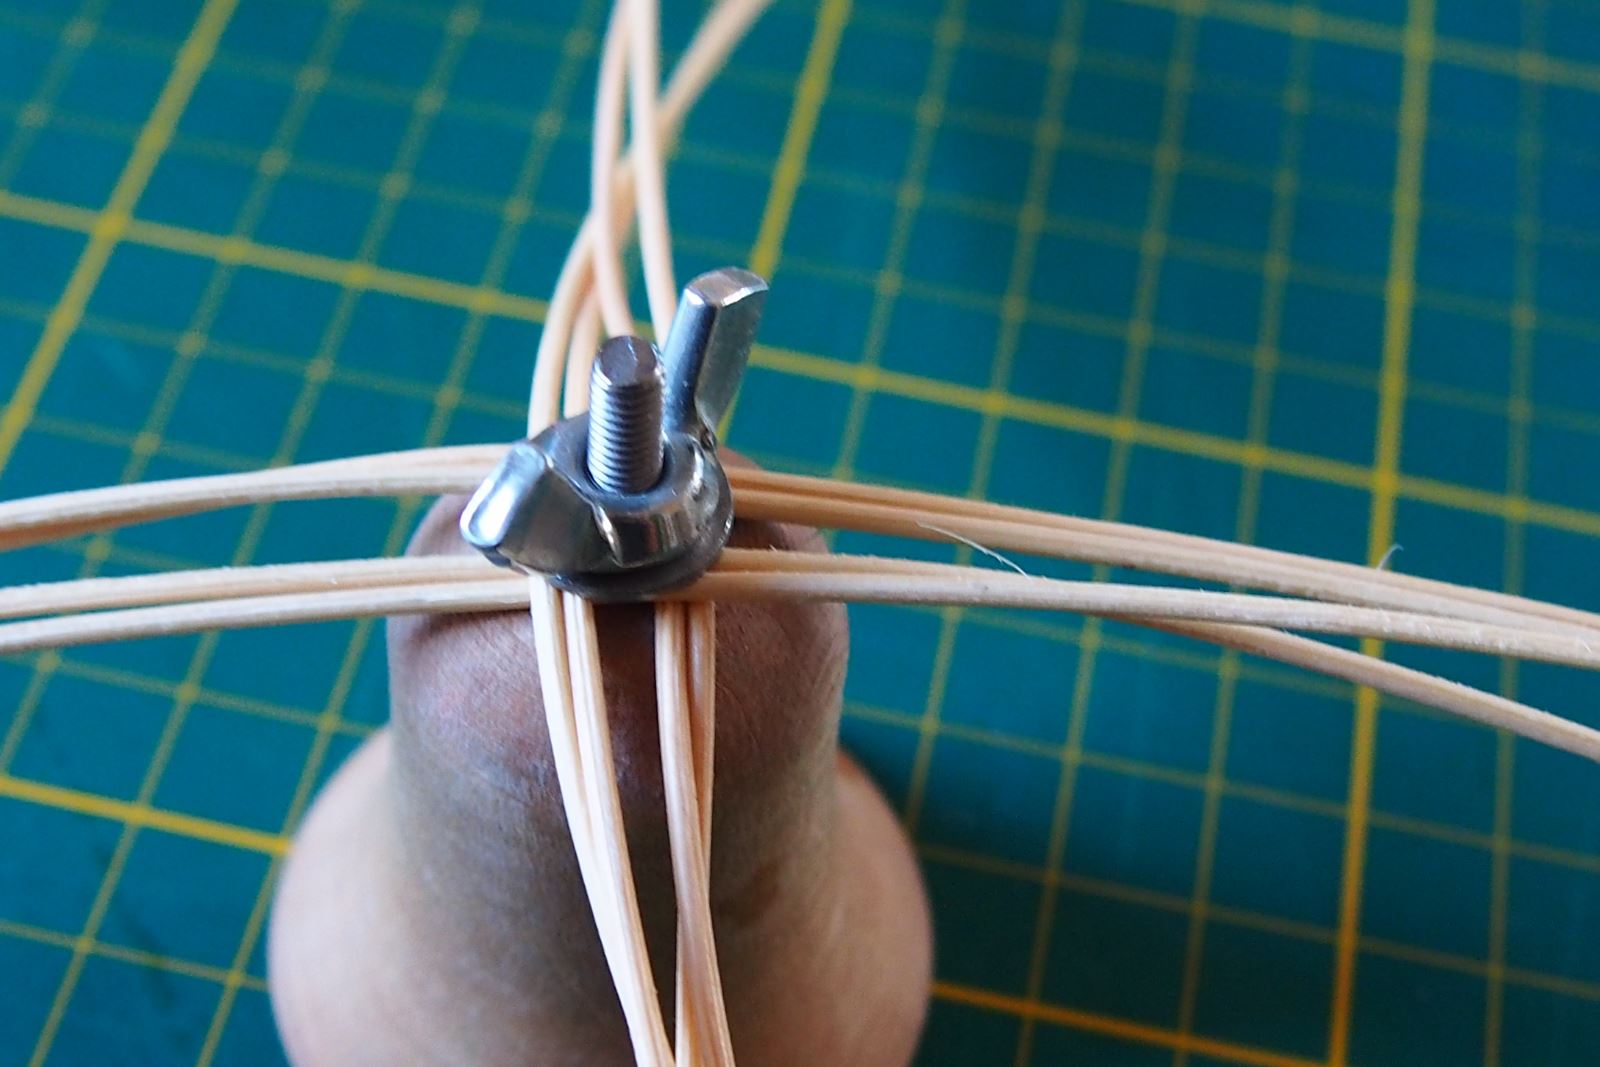
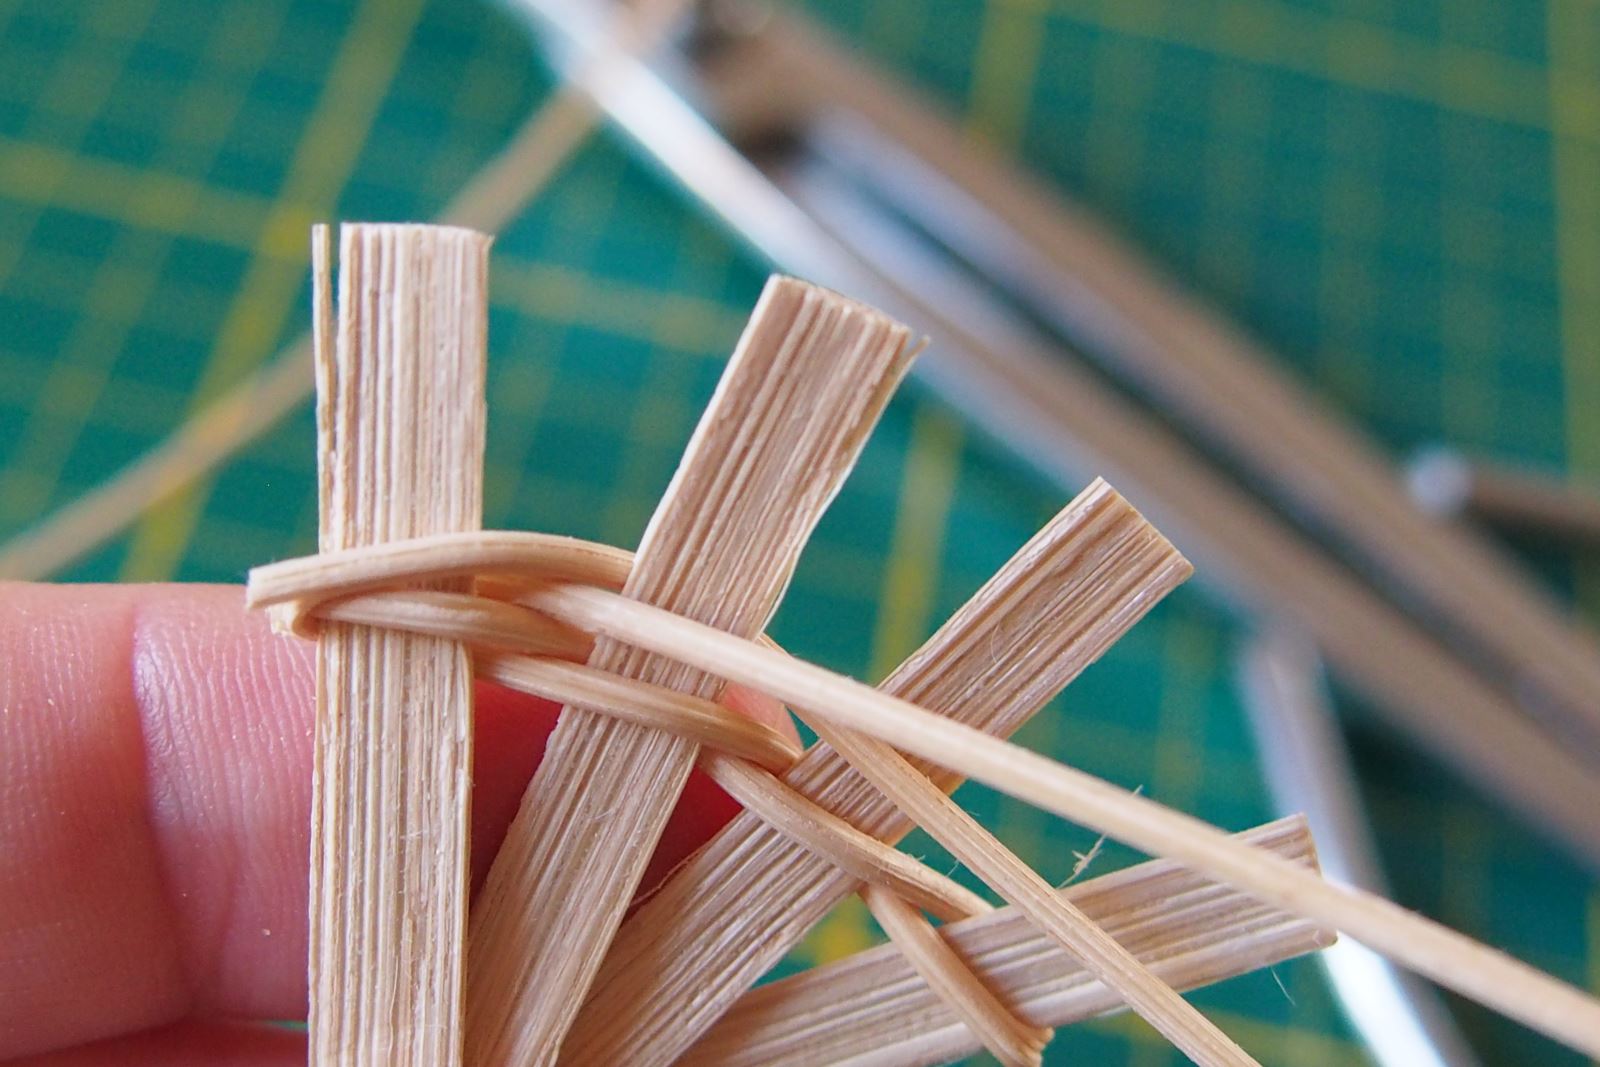
5. Tighten the first row tightly and pull towards the centre.
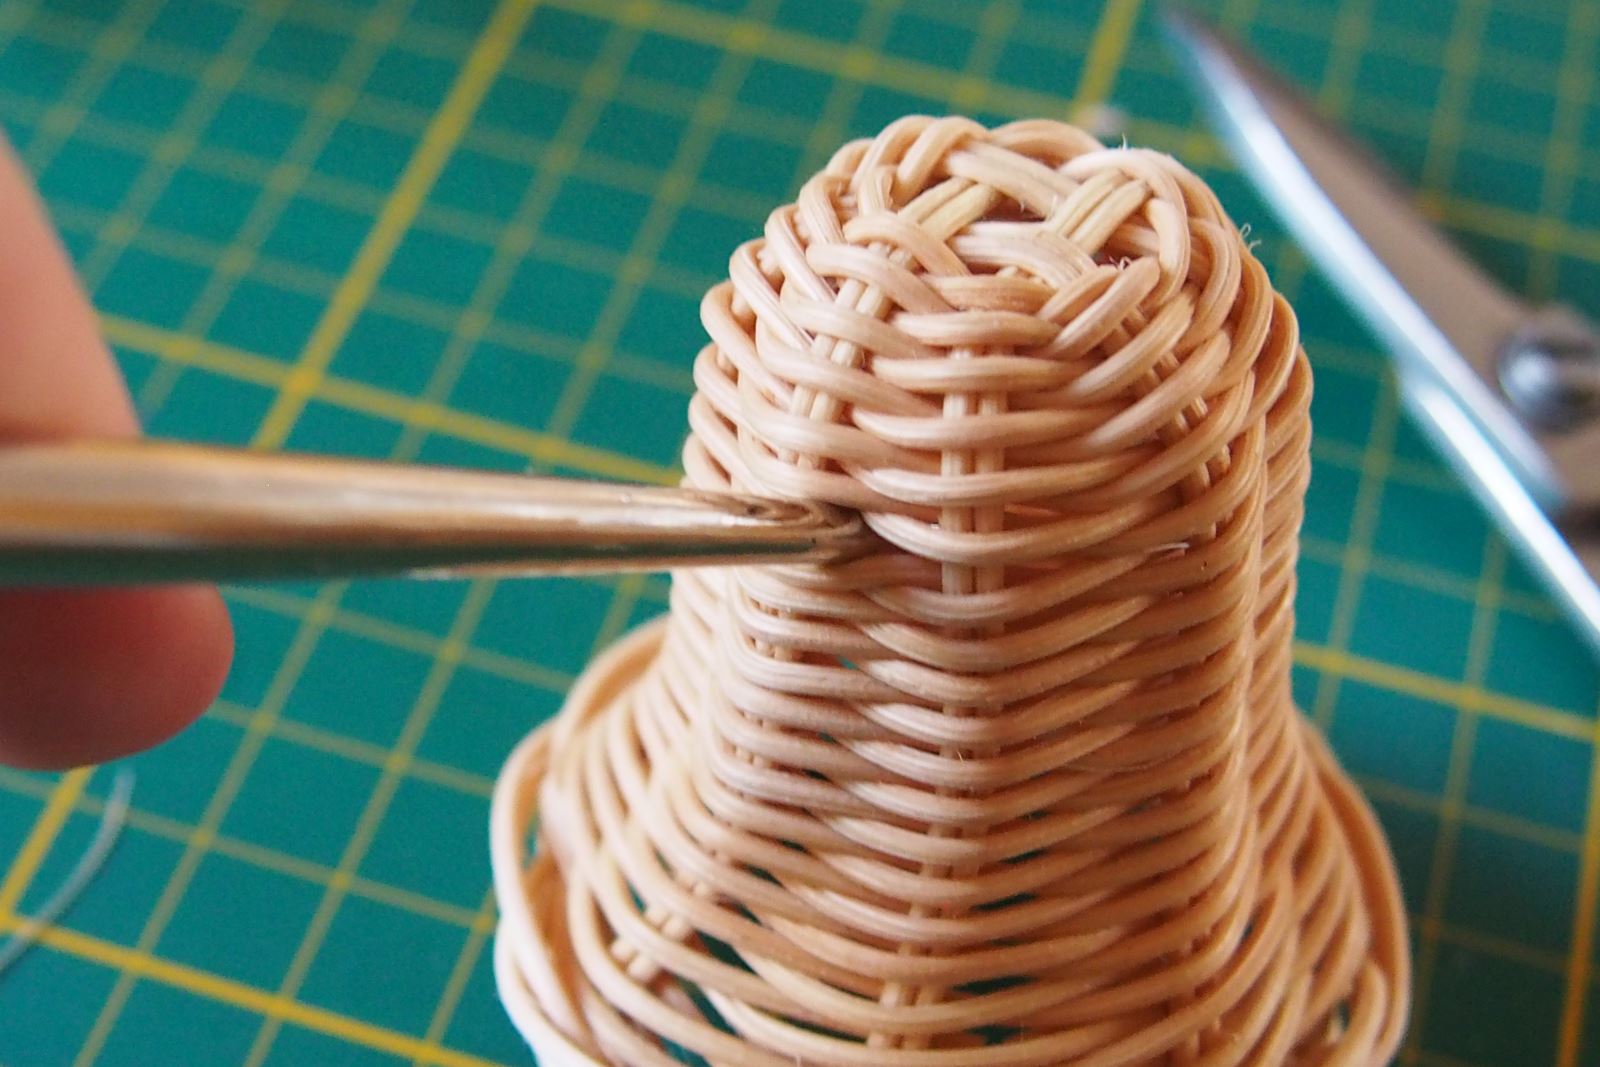
6. This is what a bell looks like after several rows. Try to weave tight on the mold. It'll help if you push your ribs to form with your thumb.

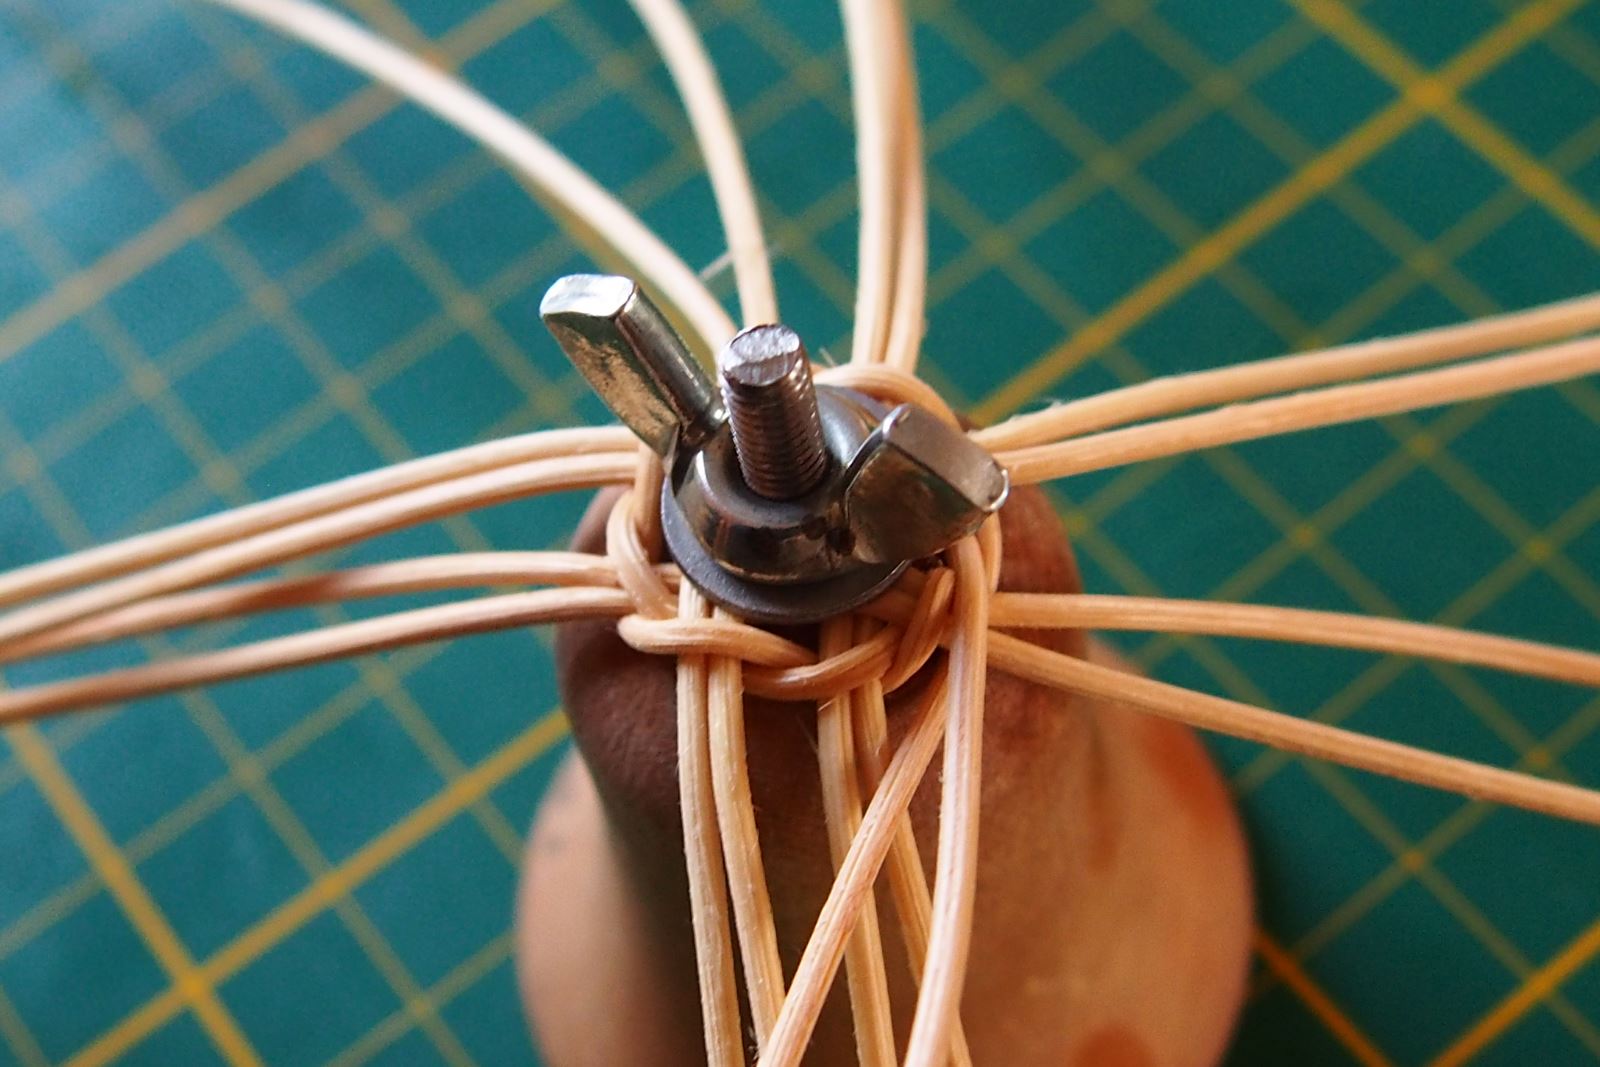
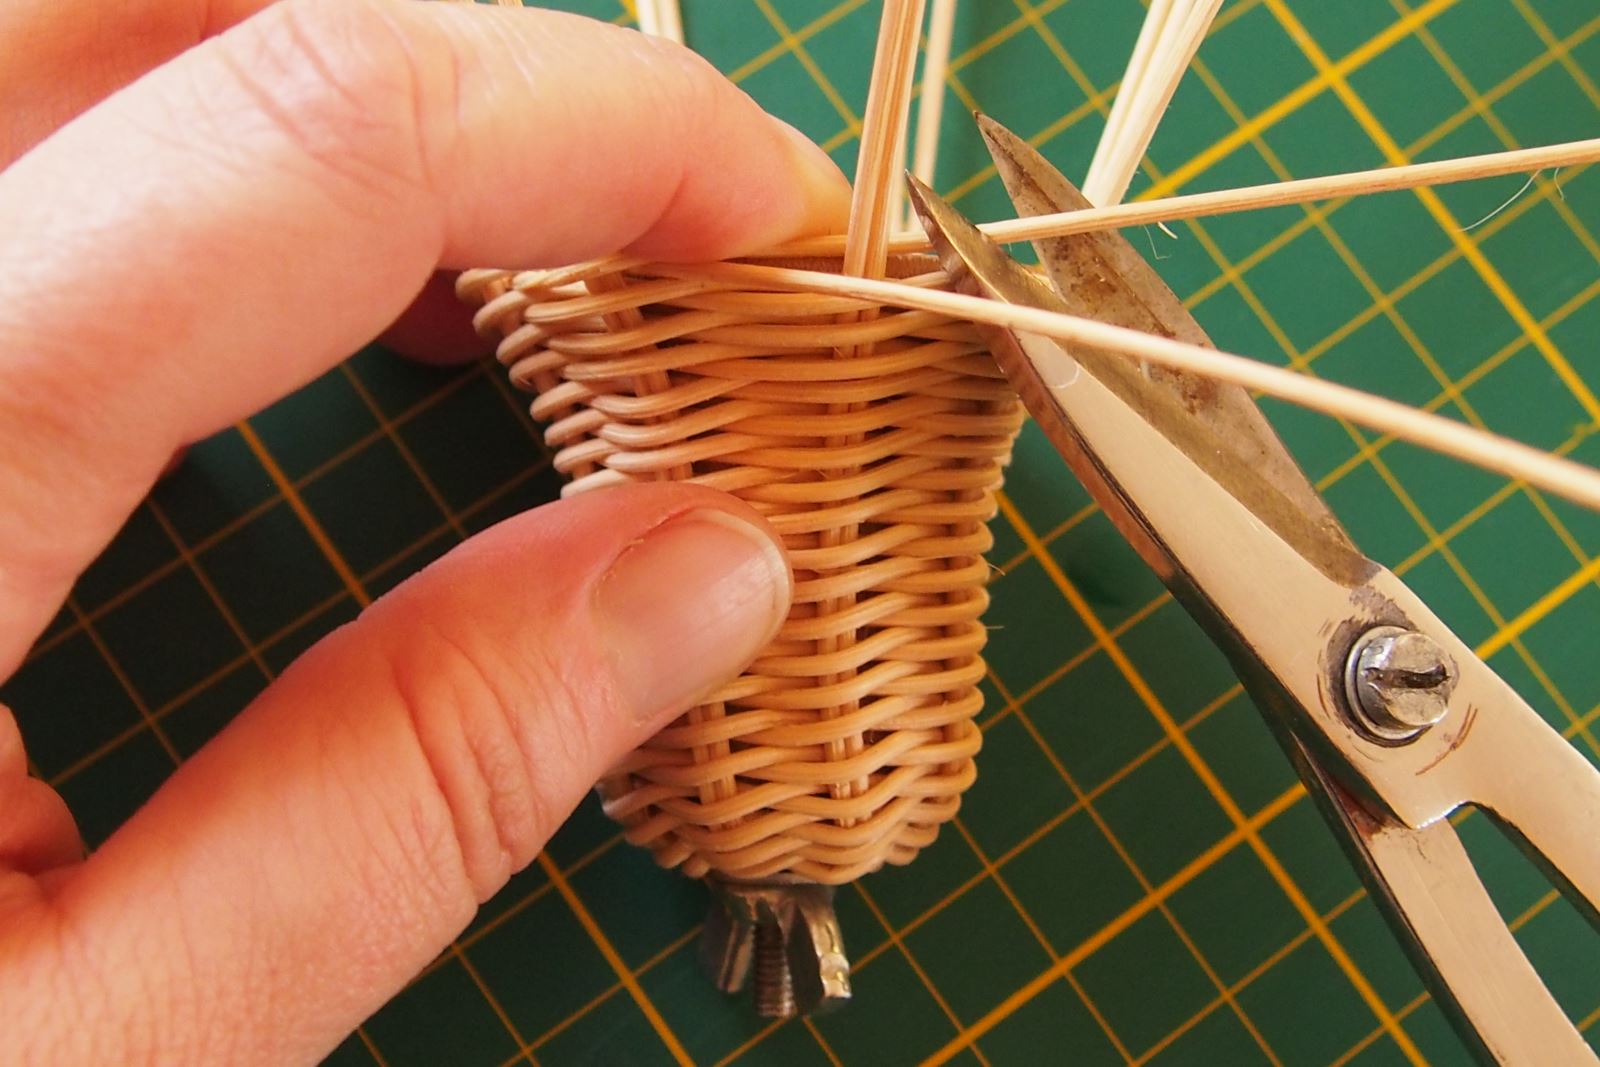
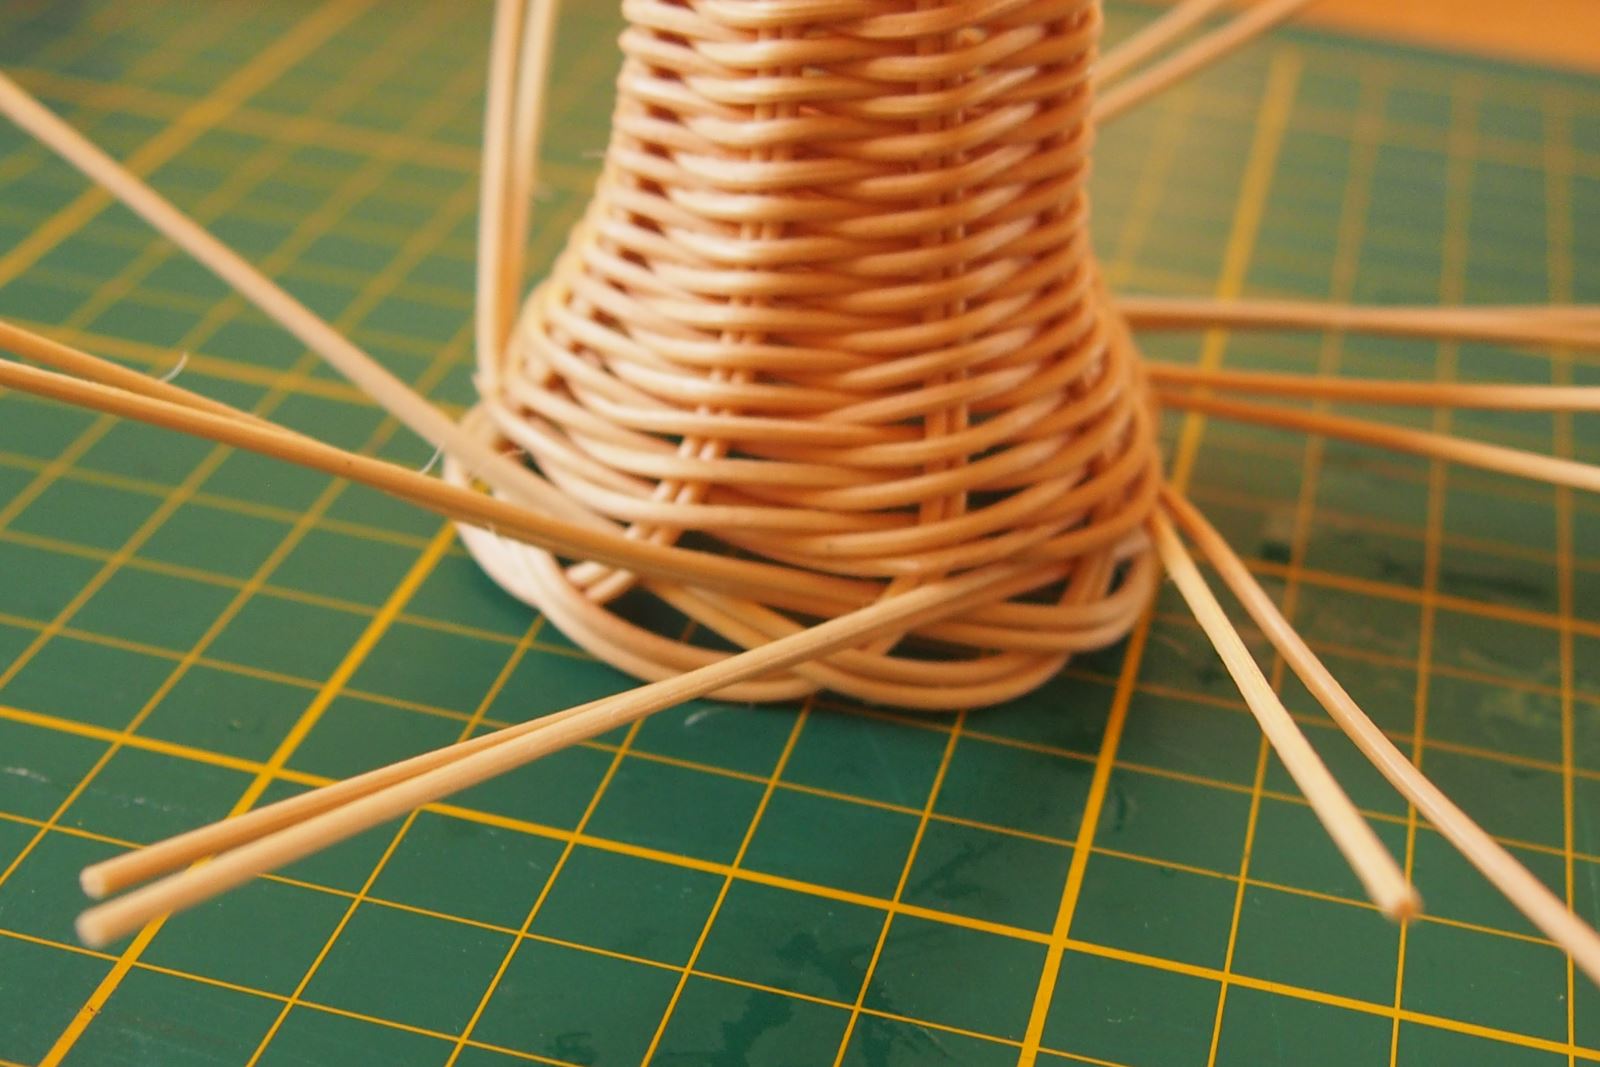
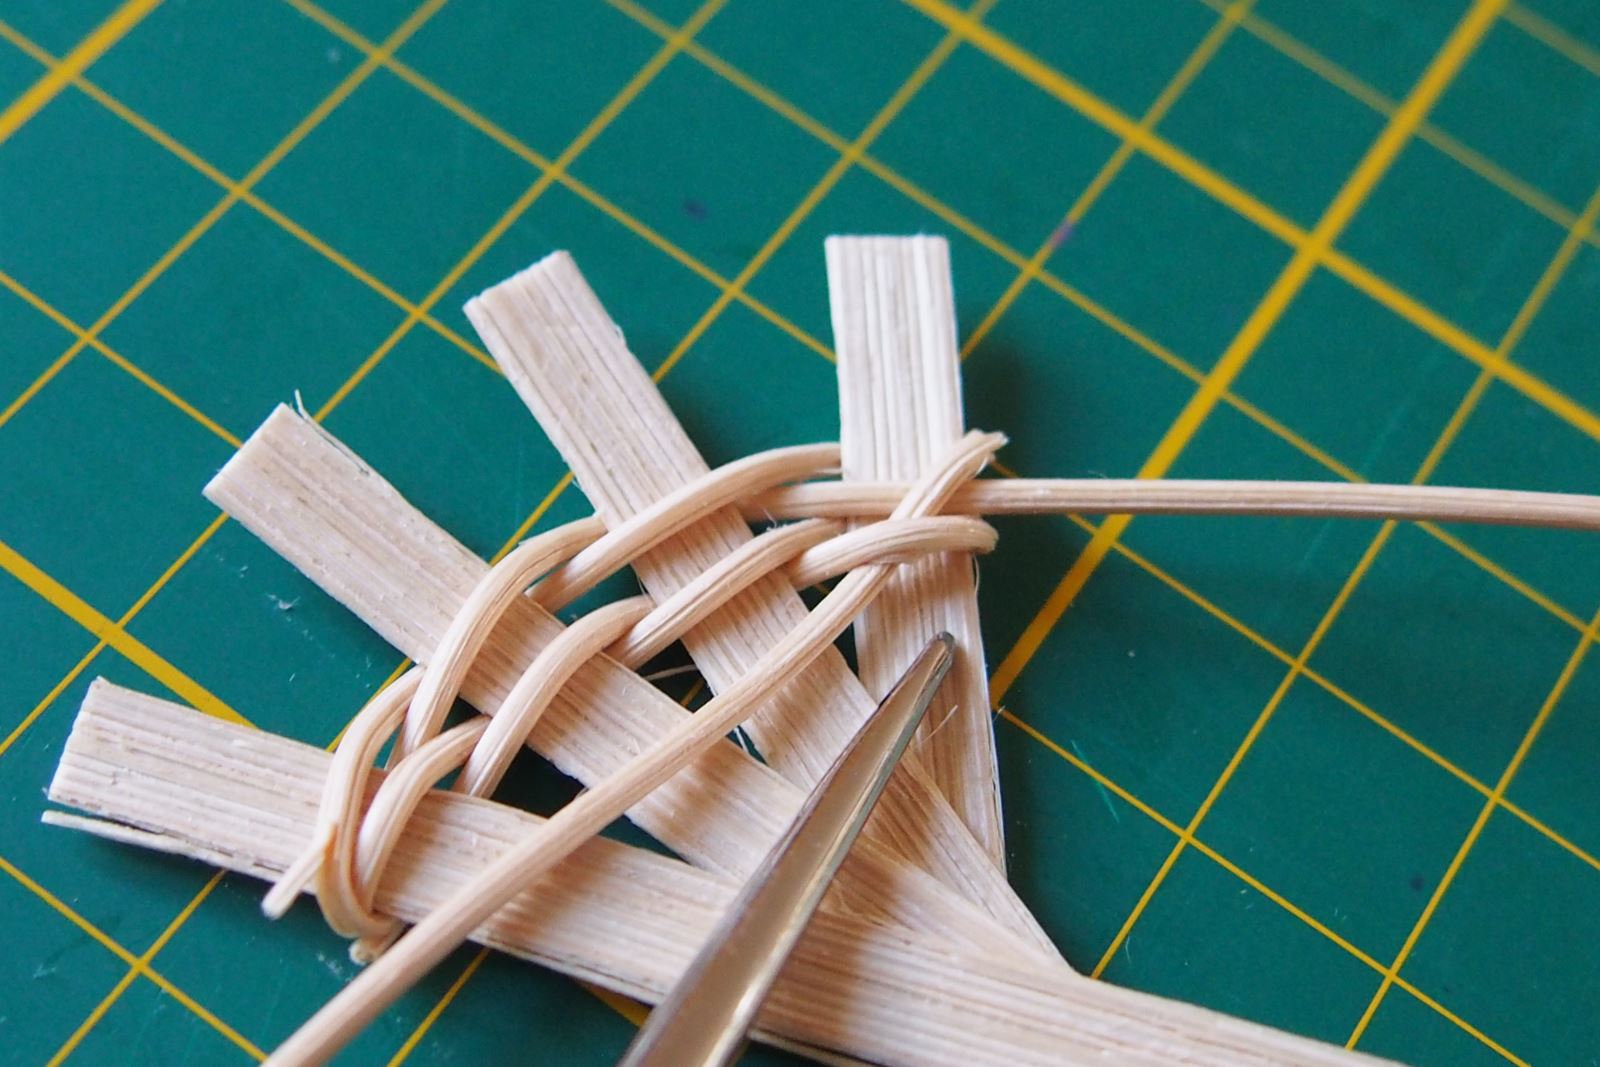
7. After finishing to the edge of the mould, trim the ends of the twigs by the ribs inside. The ends should end at the same place you started weaving
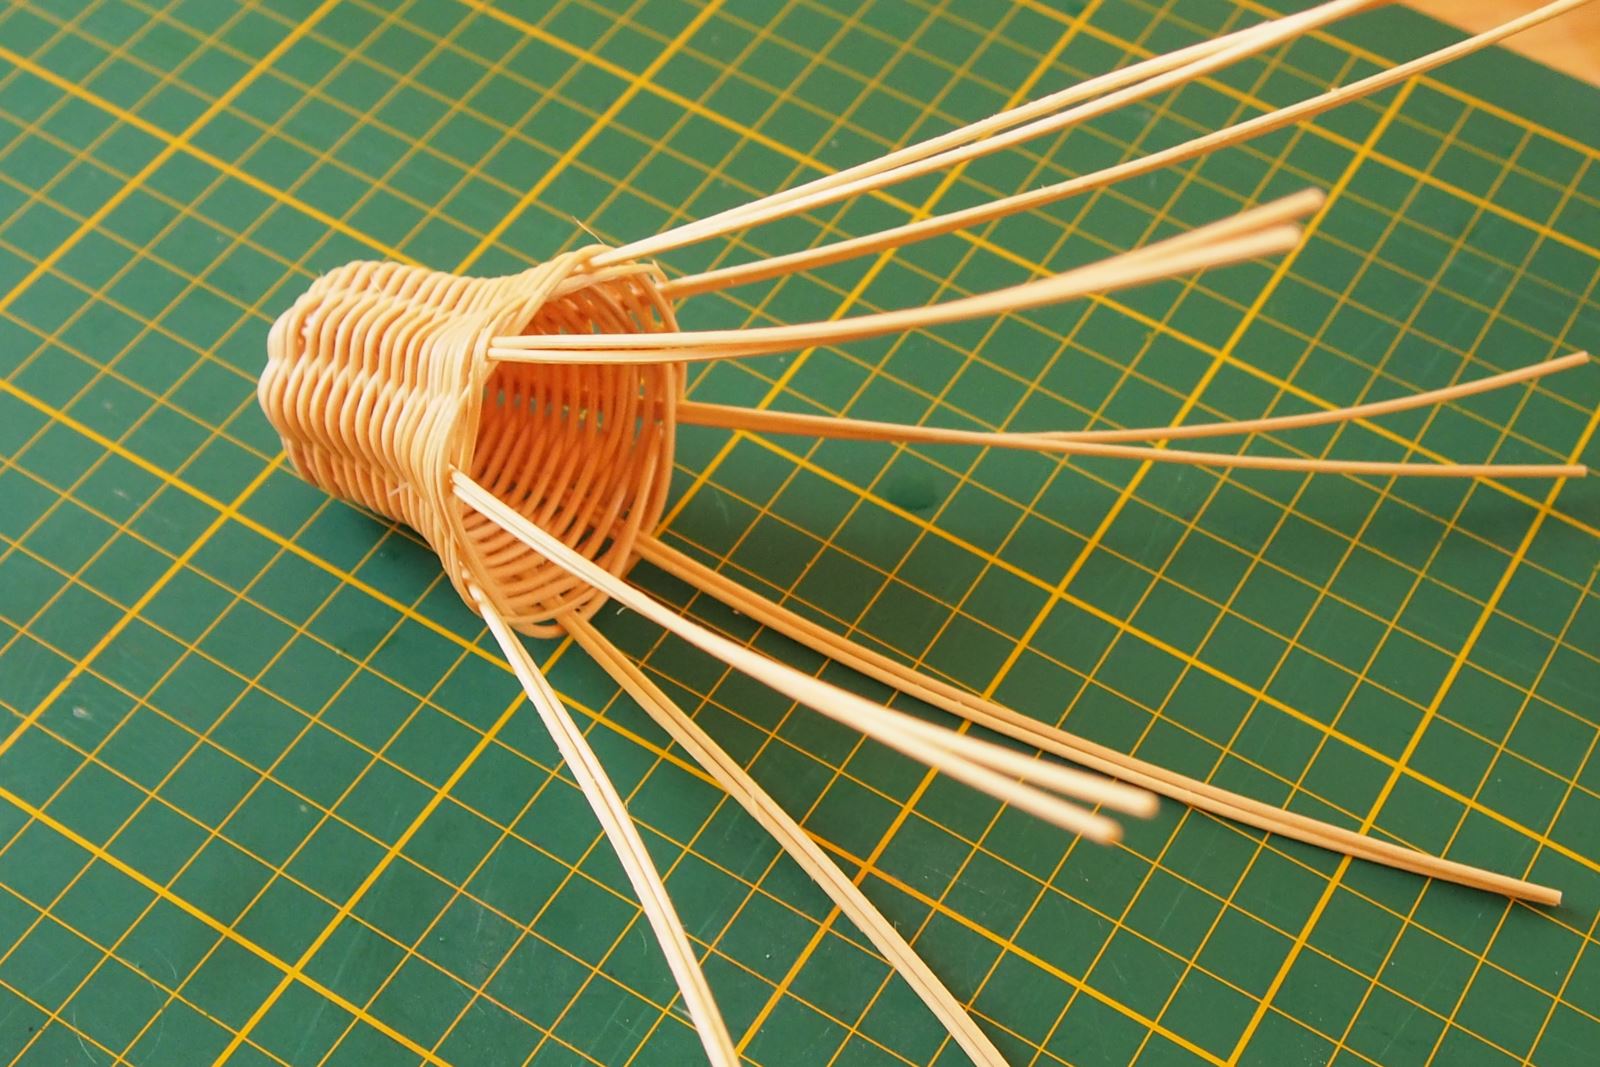
8. Get the bell off the mould
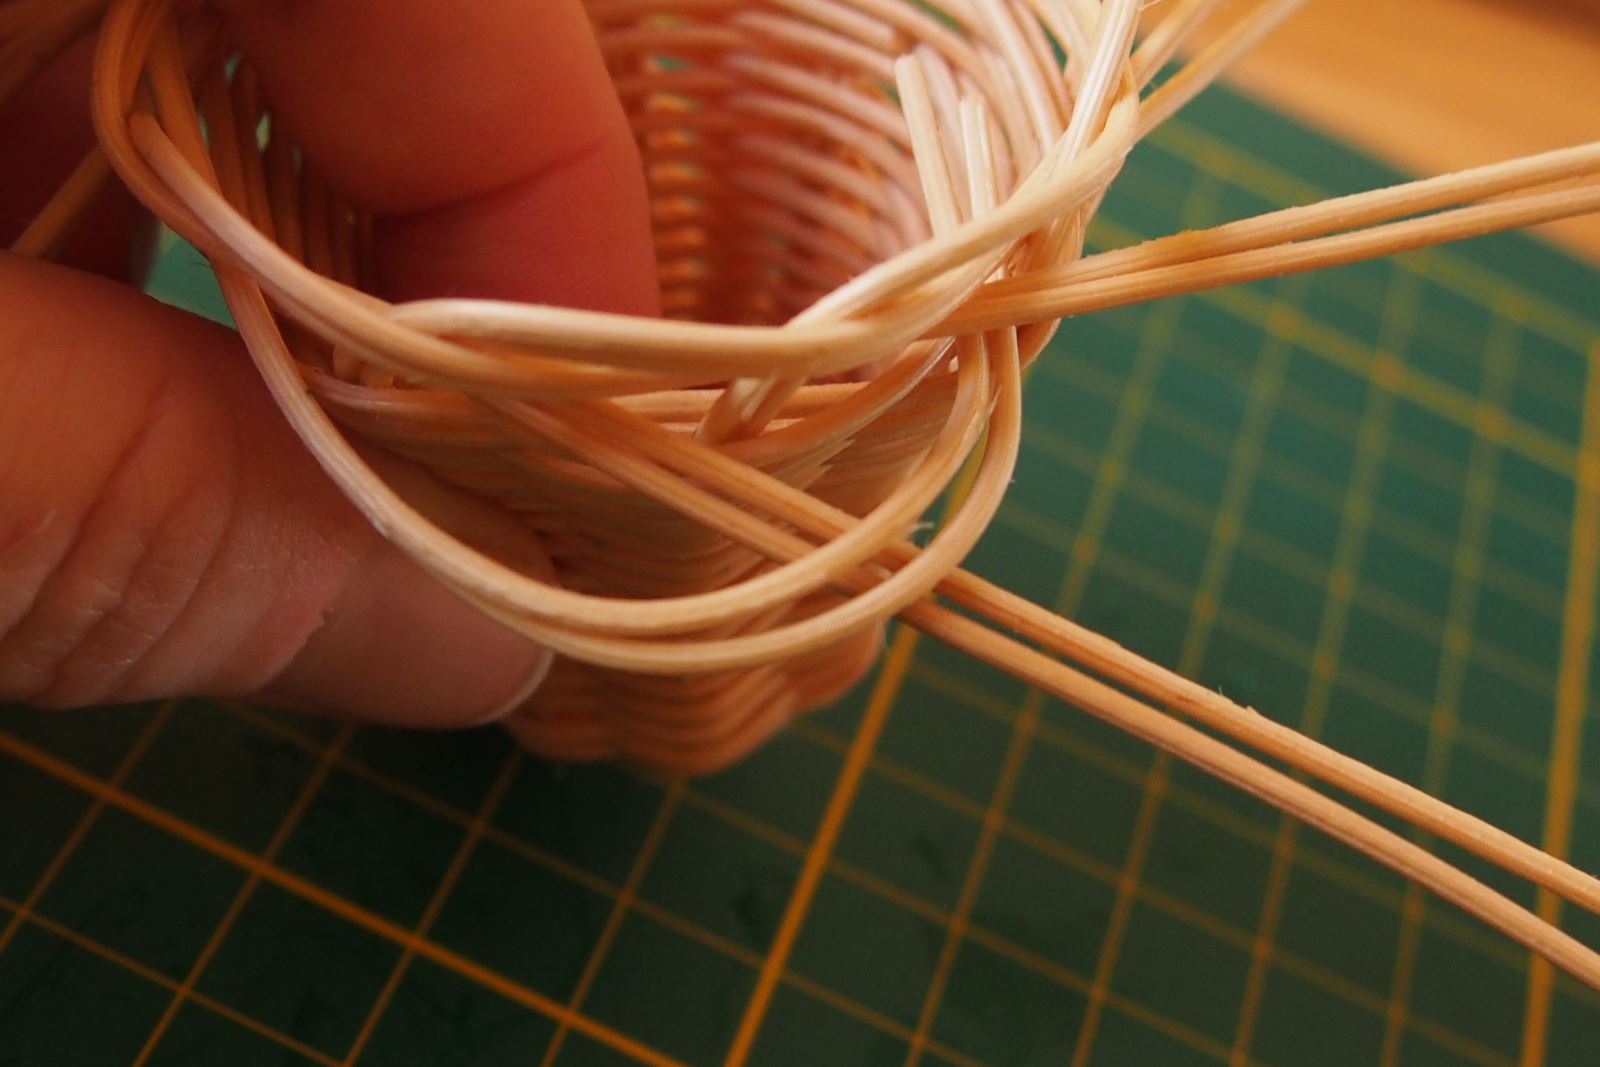
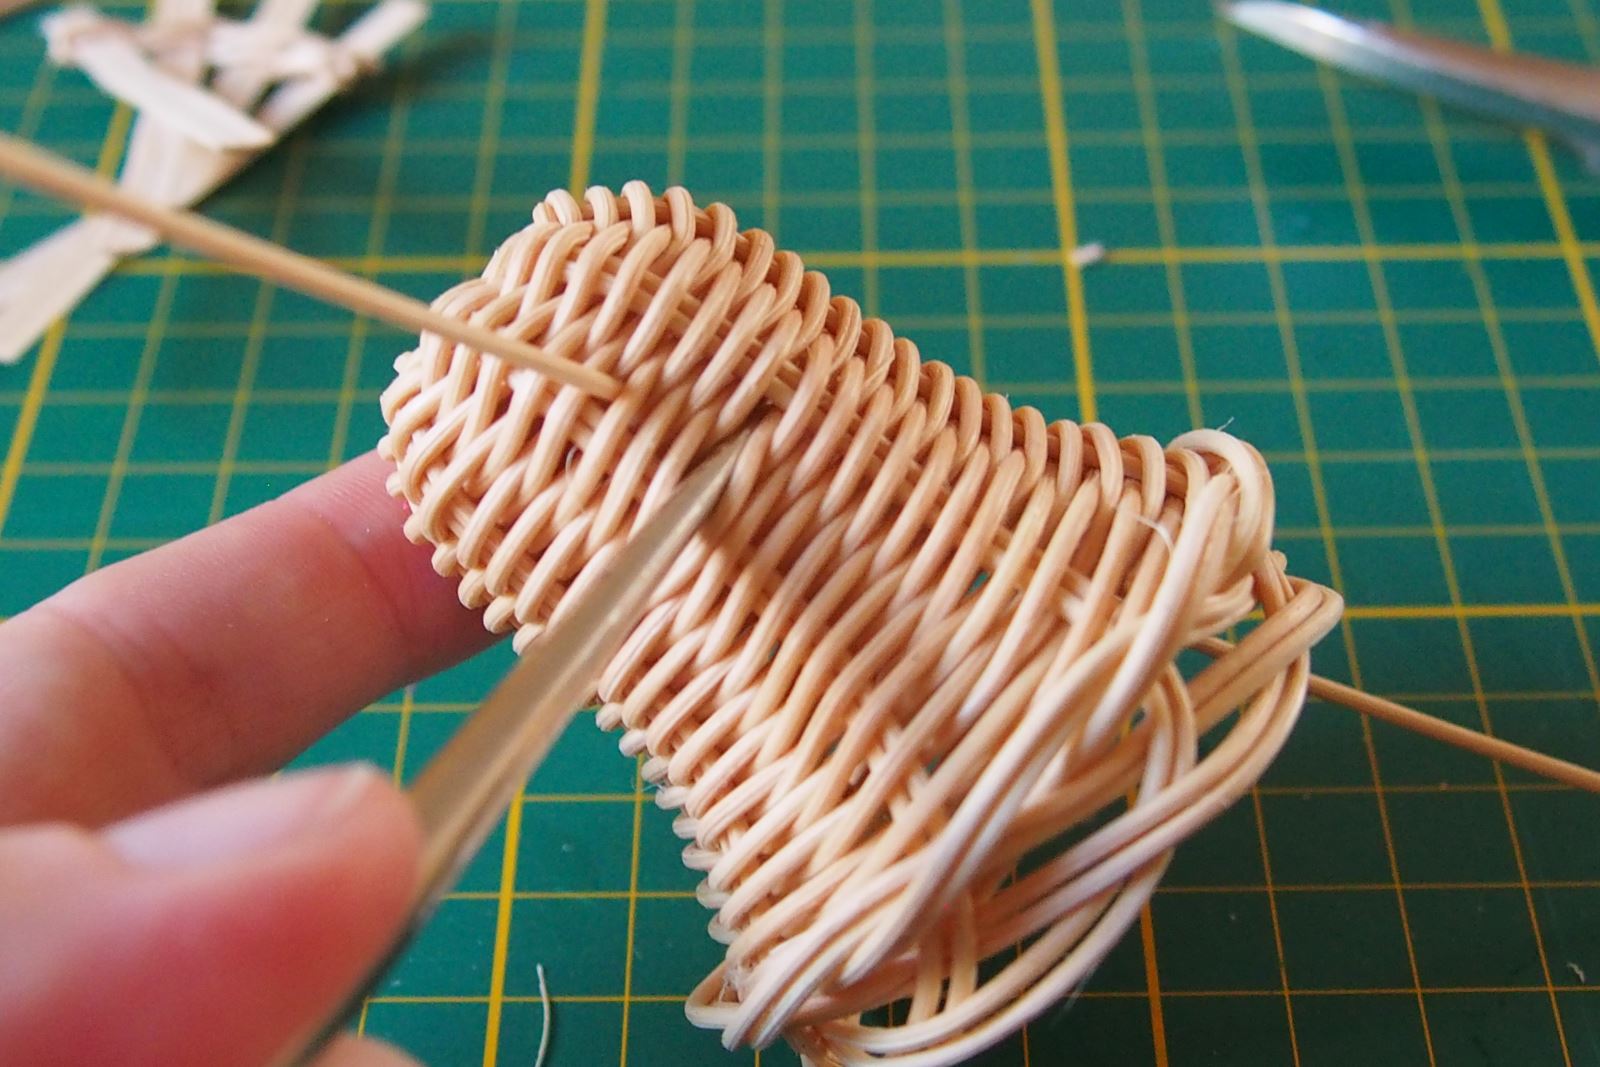
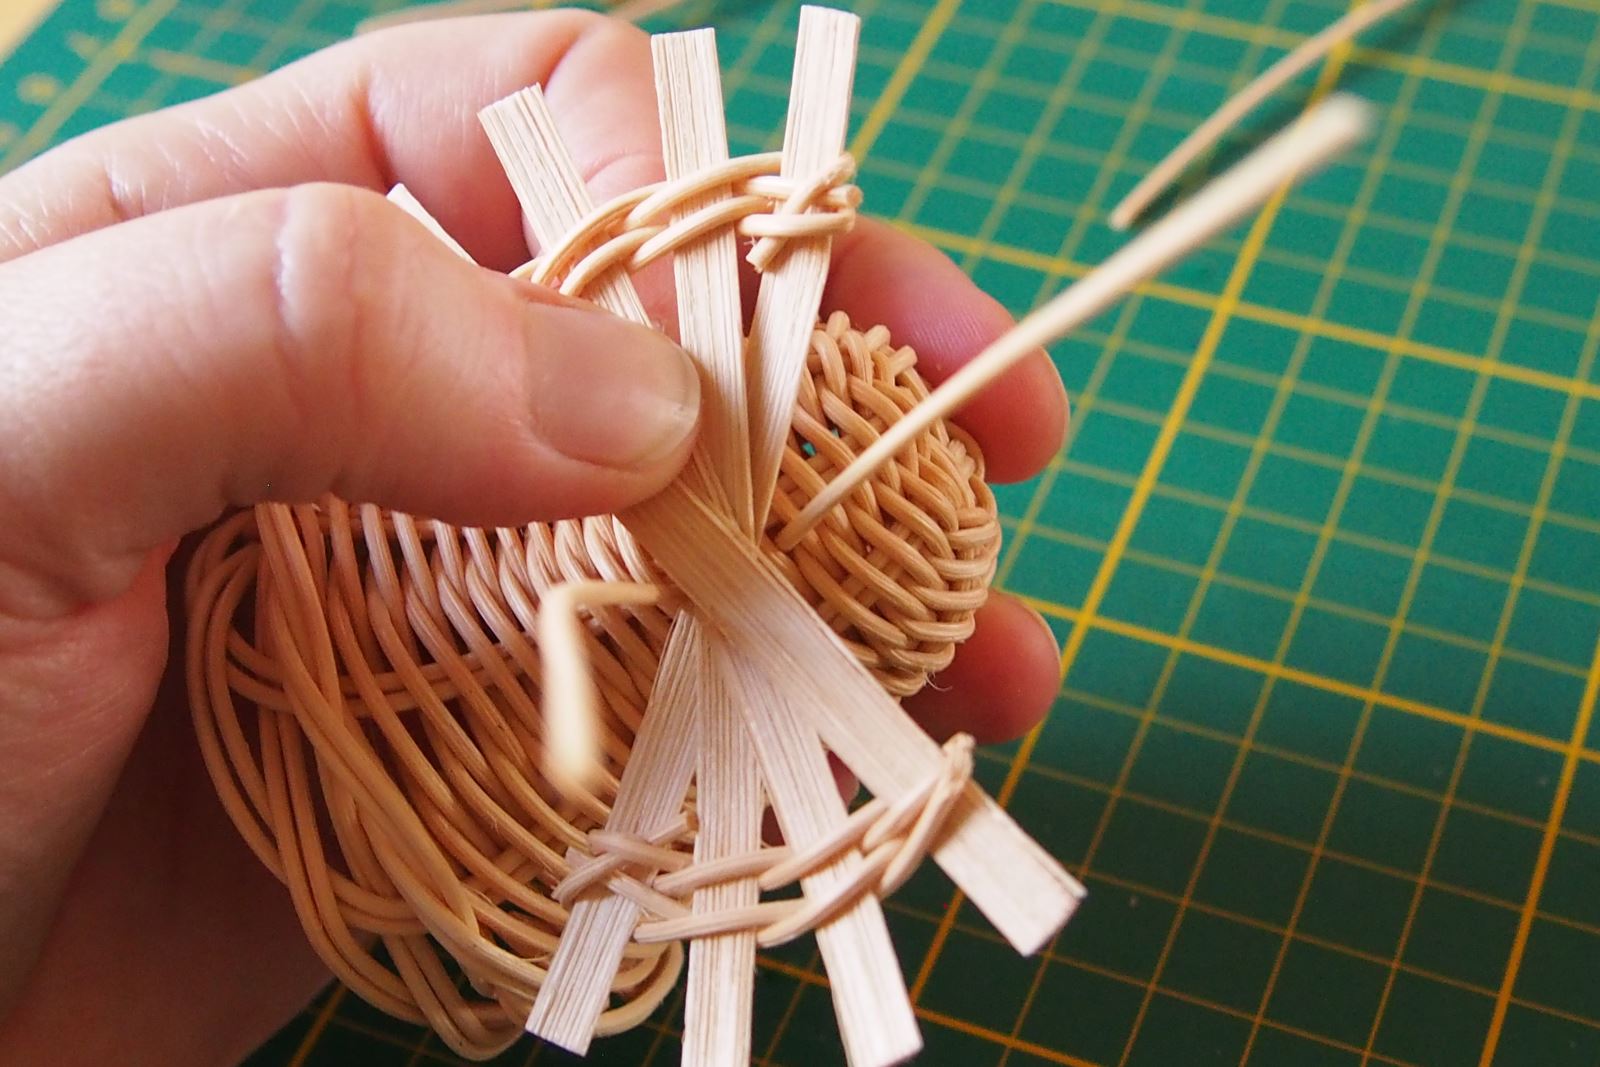
9. Now finish ribs. You can use any shutter. Lead the pair in front of the ribs, behind and out.
10. Continue this way with all pairs.

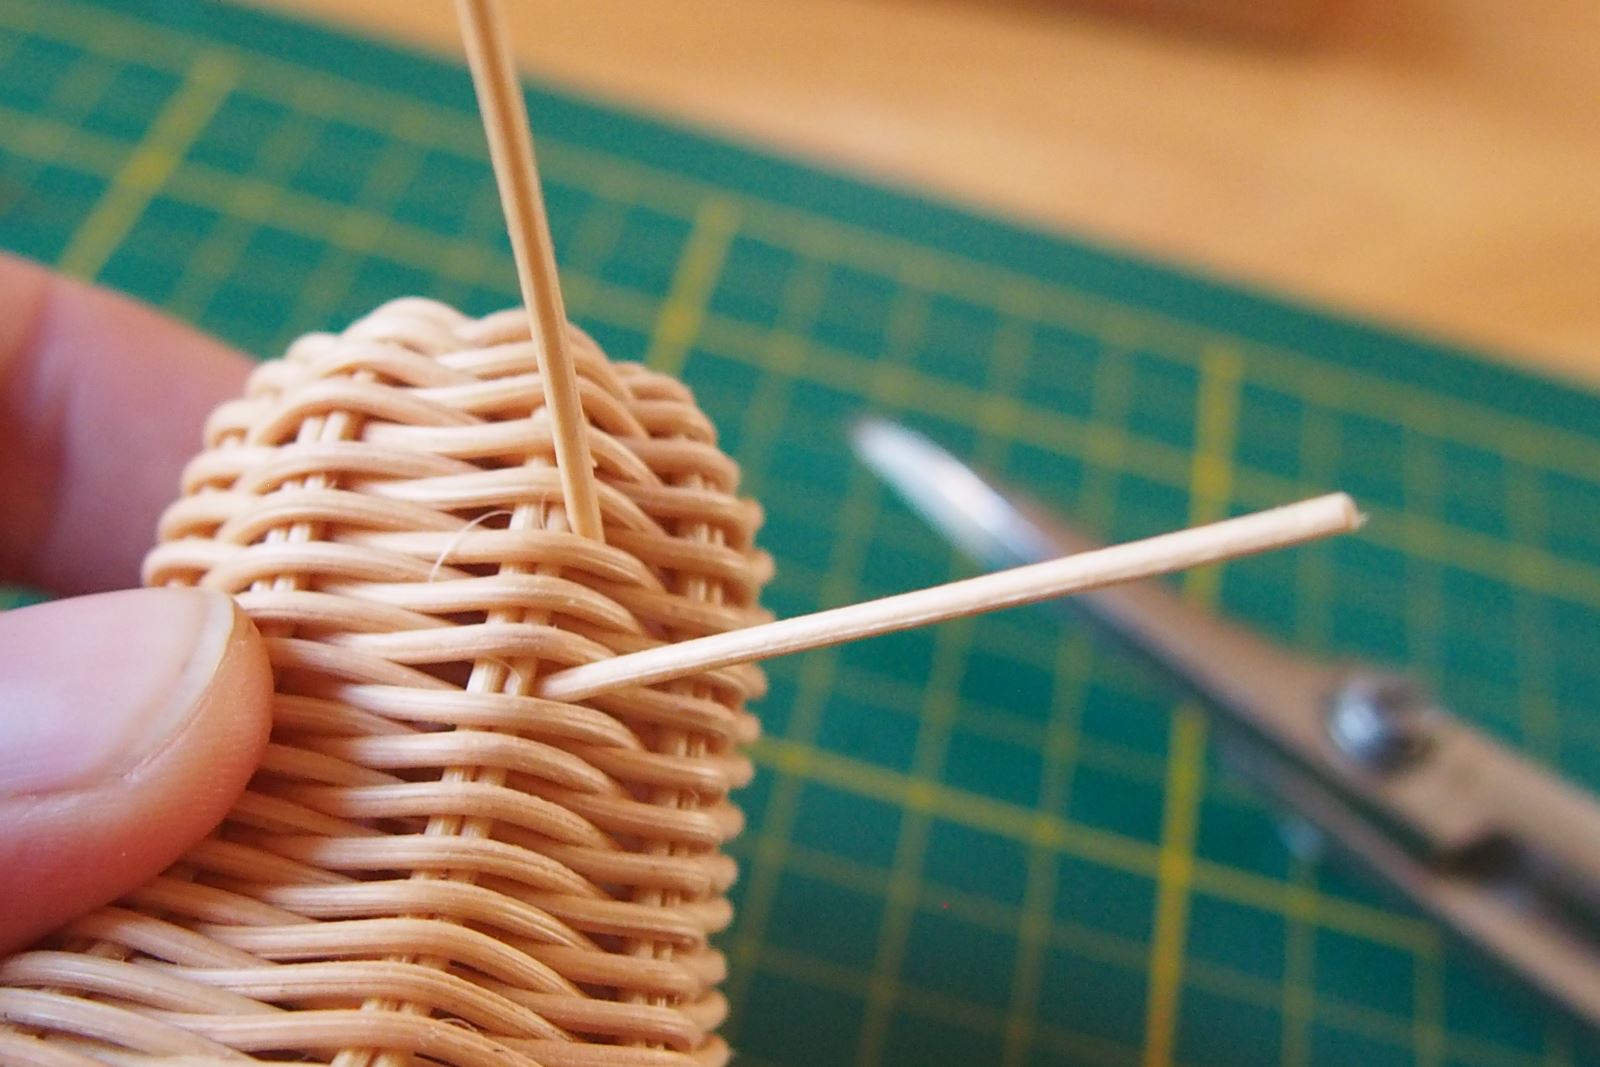
11. Here you see how to weave the last pair.
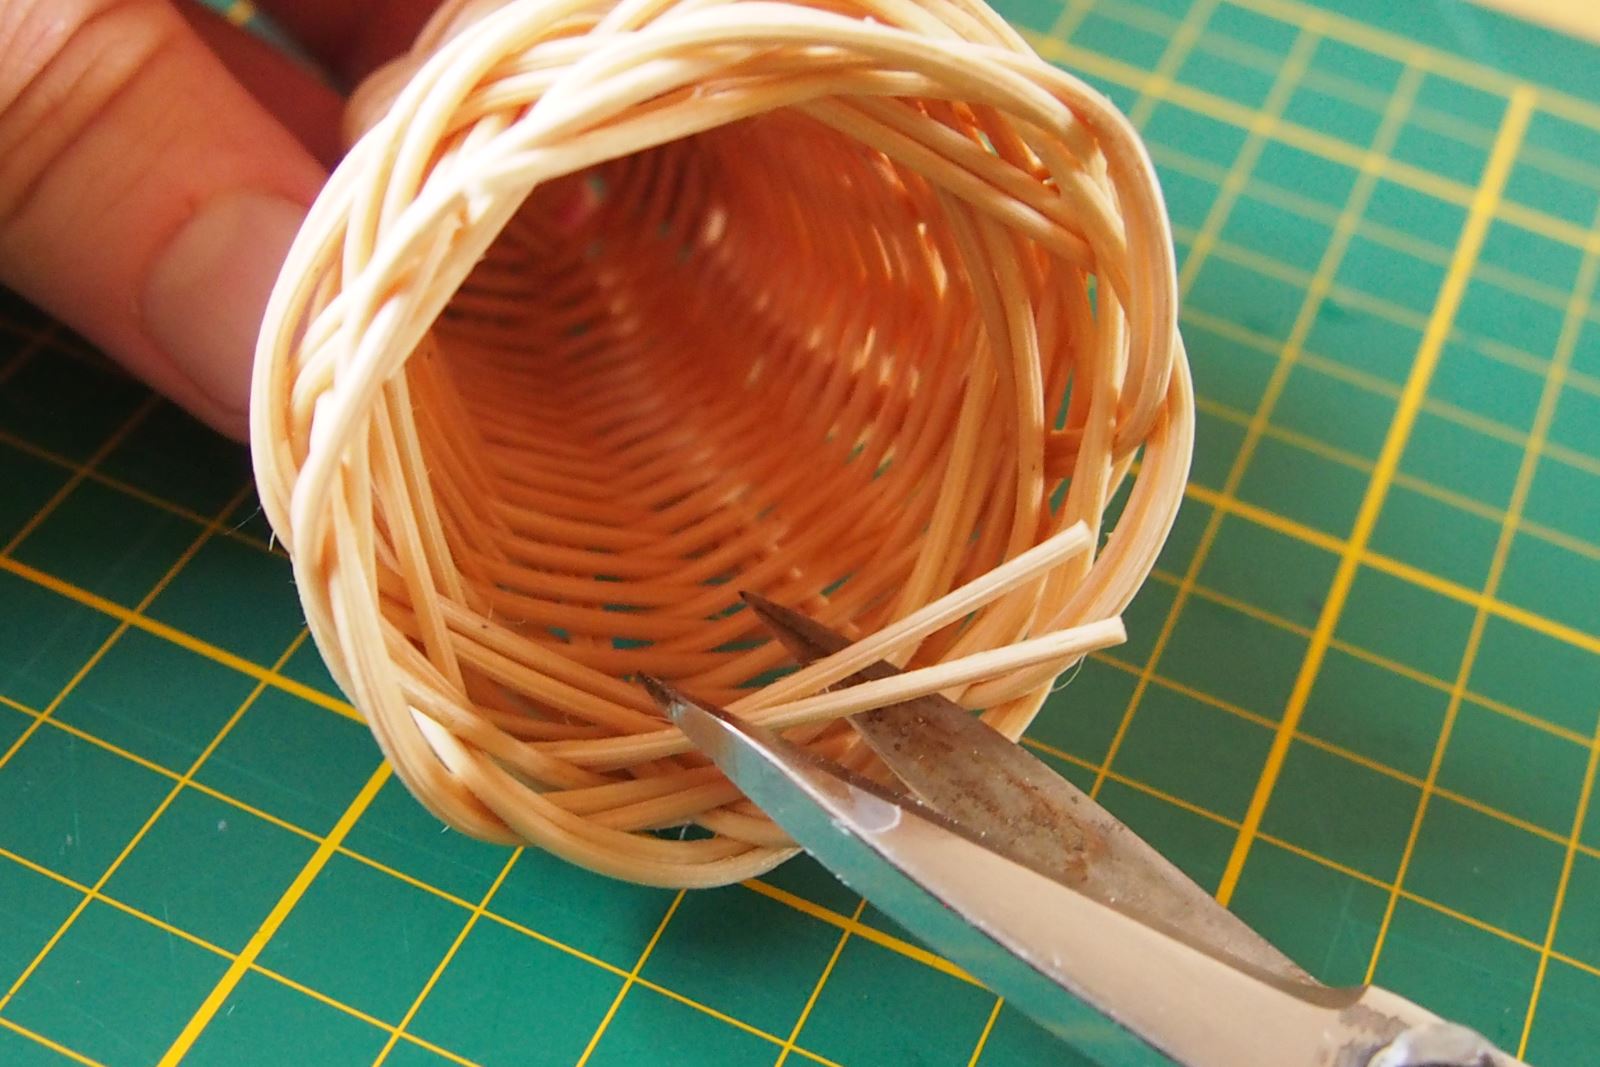
12. If you don't want to weave another decorative line, you can trim the ends where the arrows are. Proceed at all ends.
13. Trim the ends inside the bell.
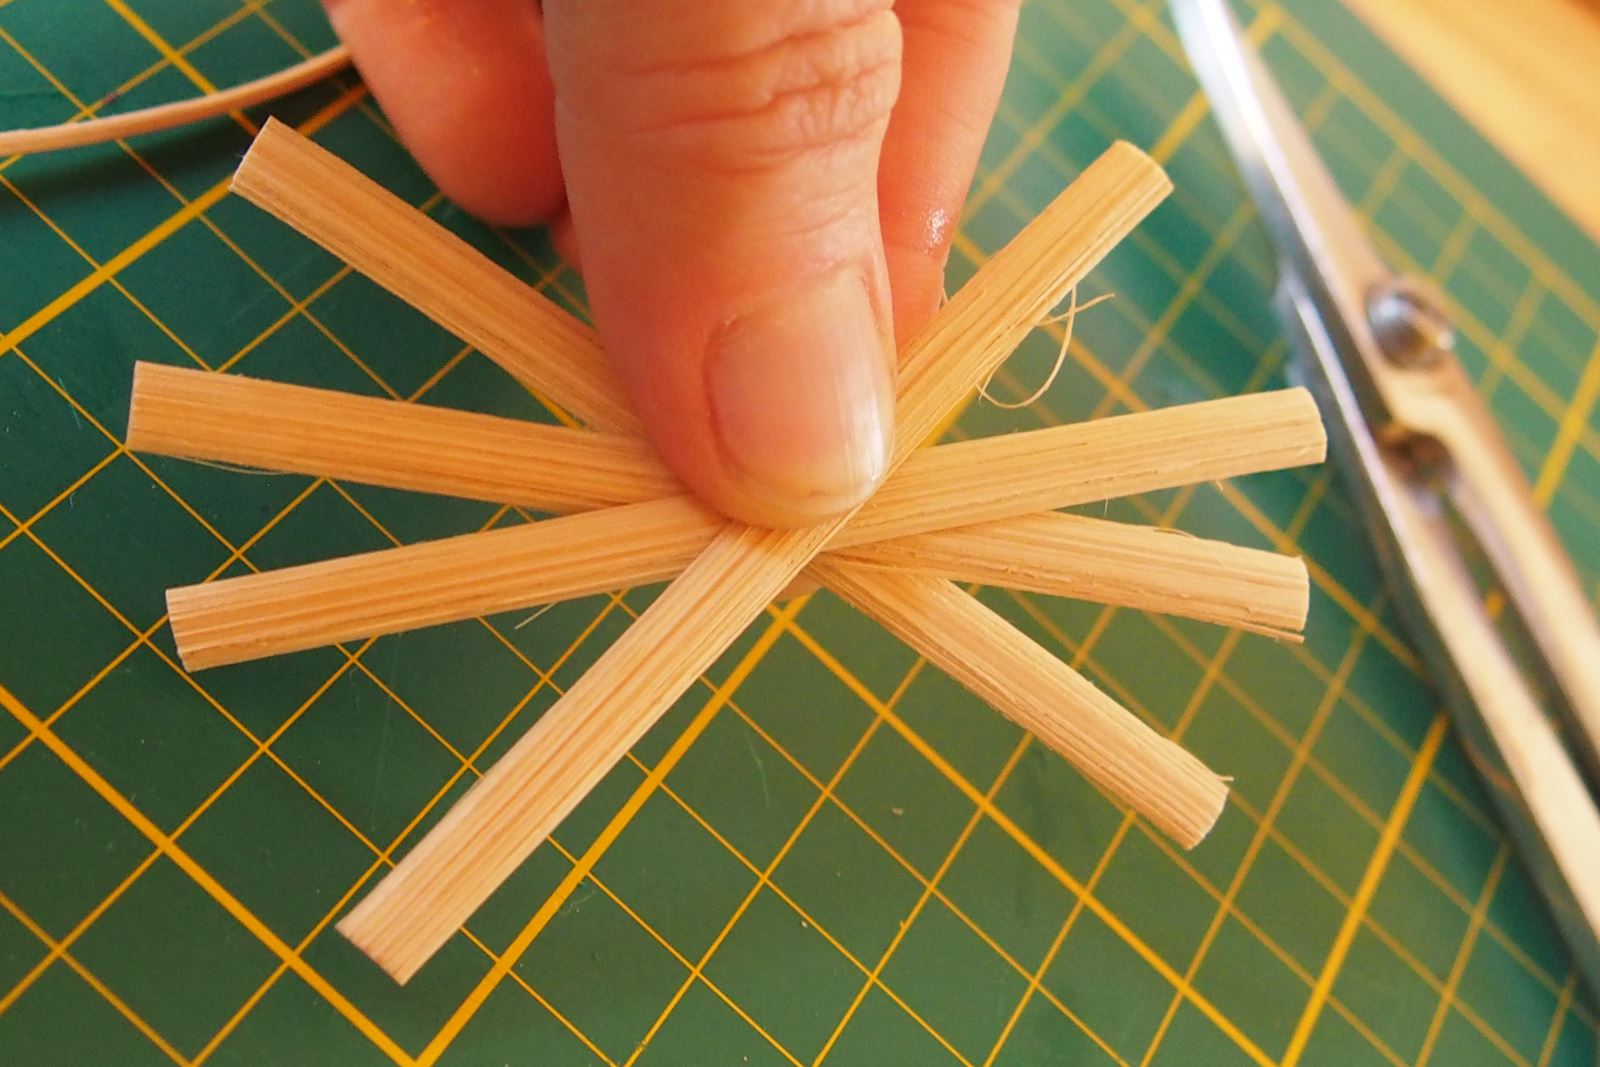
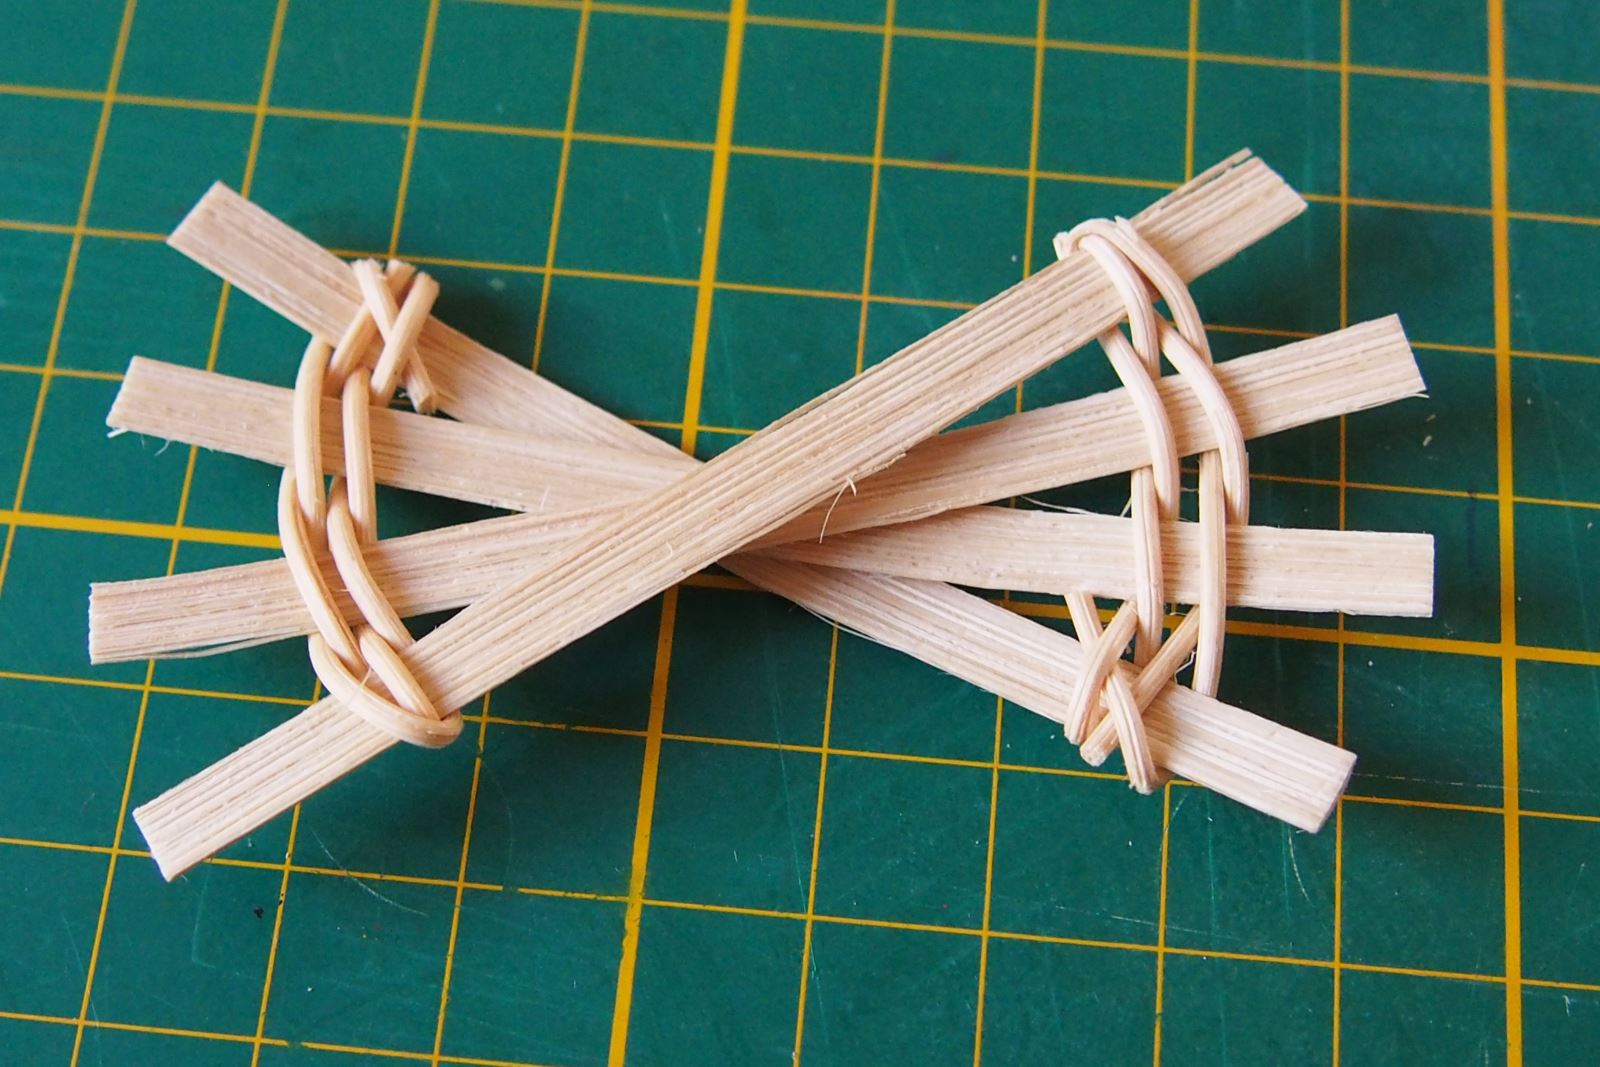
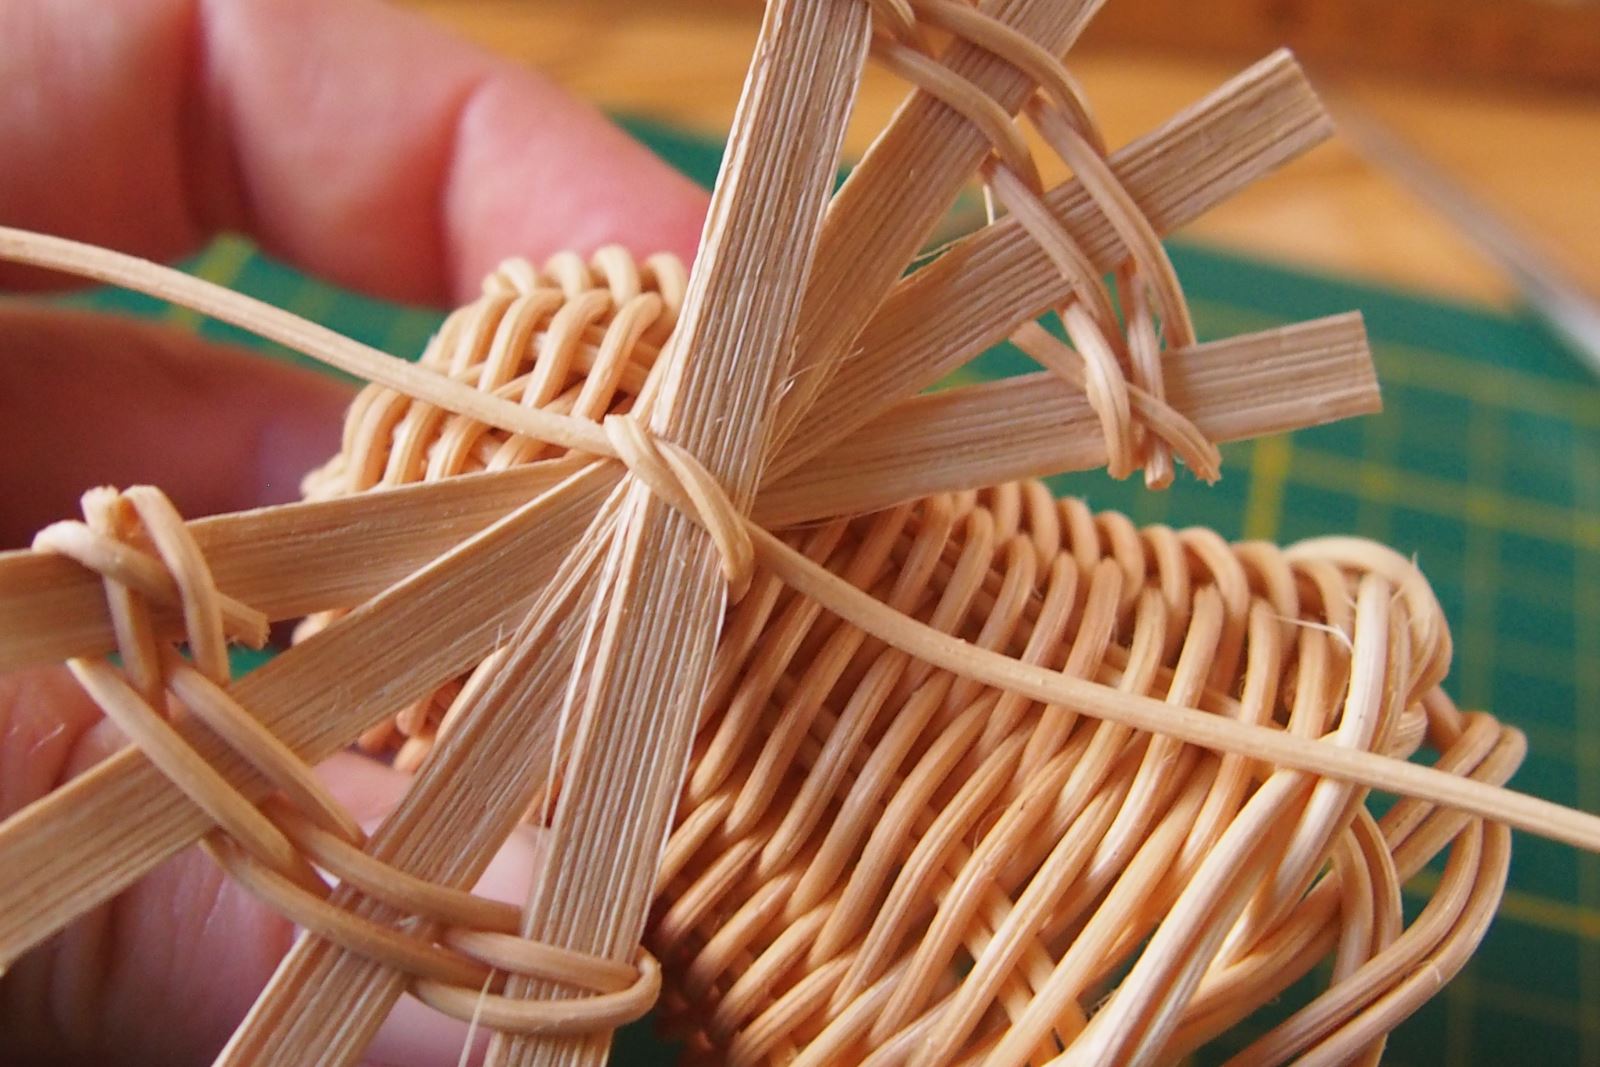
14. You'll need cane for your wings. Cross them in the middle.
15. Bend the soaked short twig in the middle and place on the outer shank.

16. Weave the familiar tangle of two. Always weave the top wand by leading it under the next pair and up.
17. At the end of the row, turn the wings on the reverse side, bend the ends of the loops and skin in the same way on the reverse side until the end.
18. Use the awl to finish both ends of the flying sticks as shown in the picture.
19. Weave the other side of the wing in the same way. This is the reverse side, where the cane is straight.
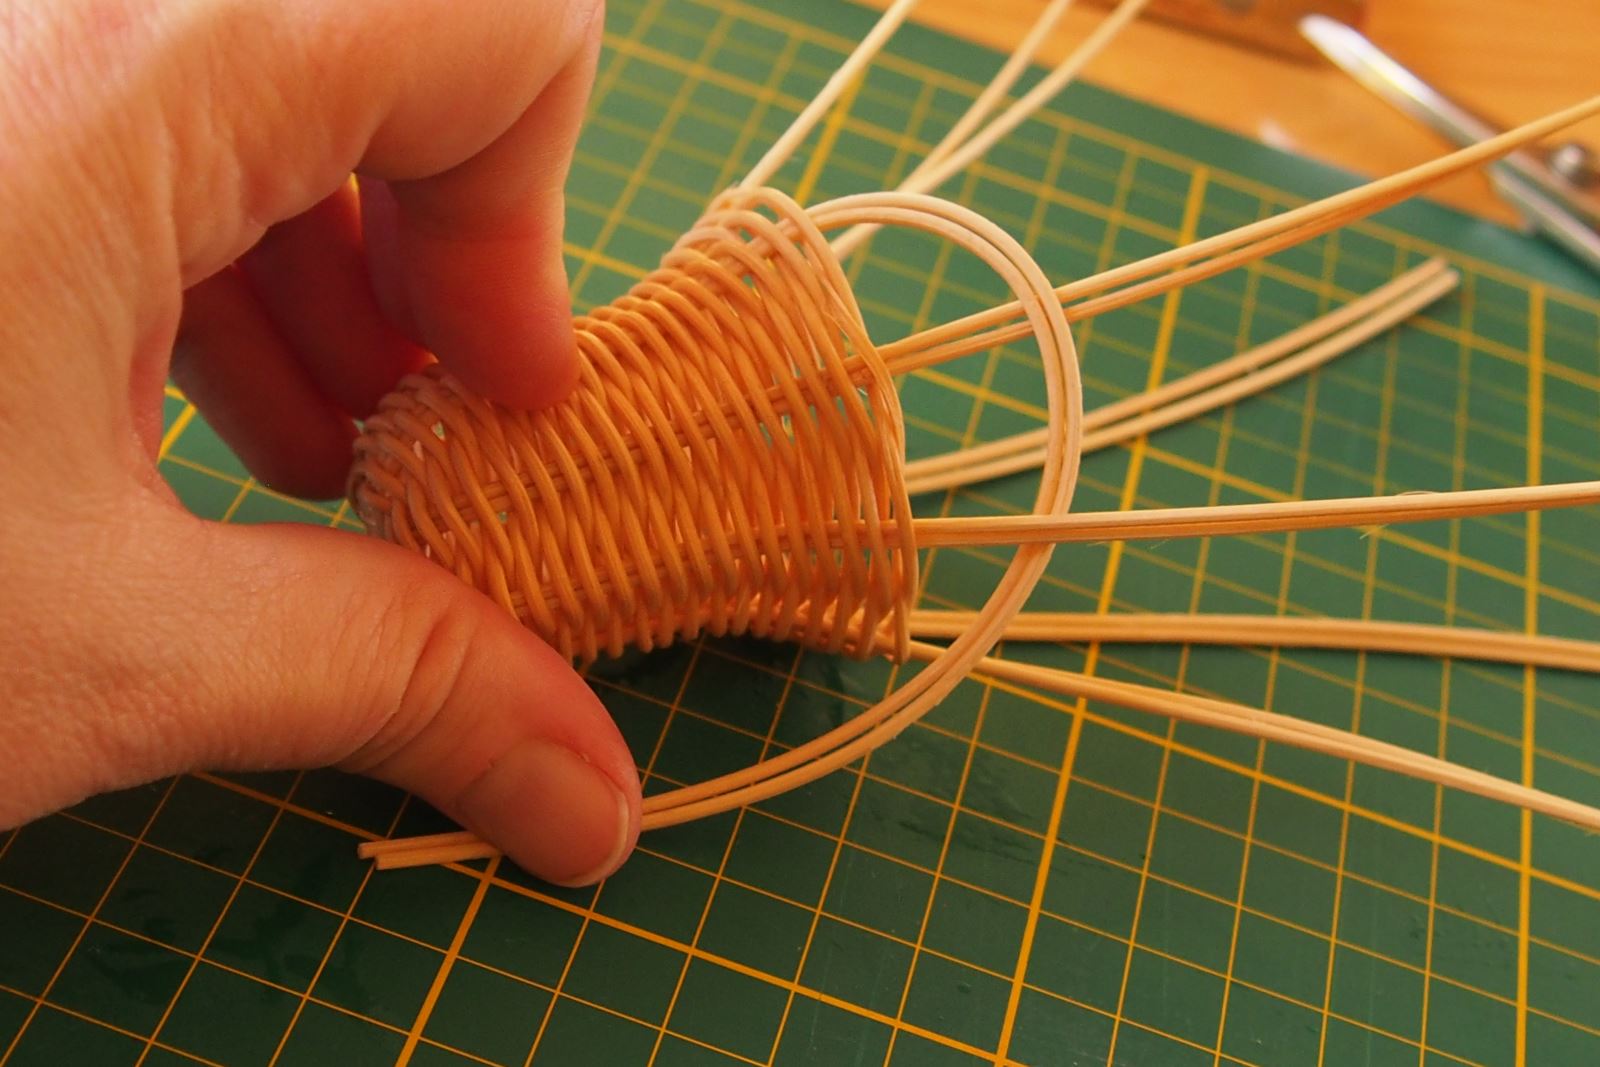
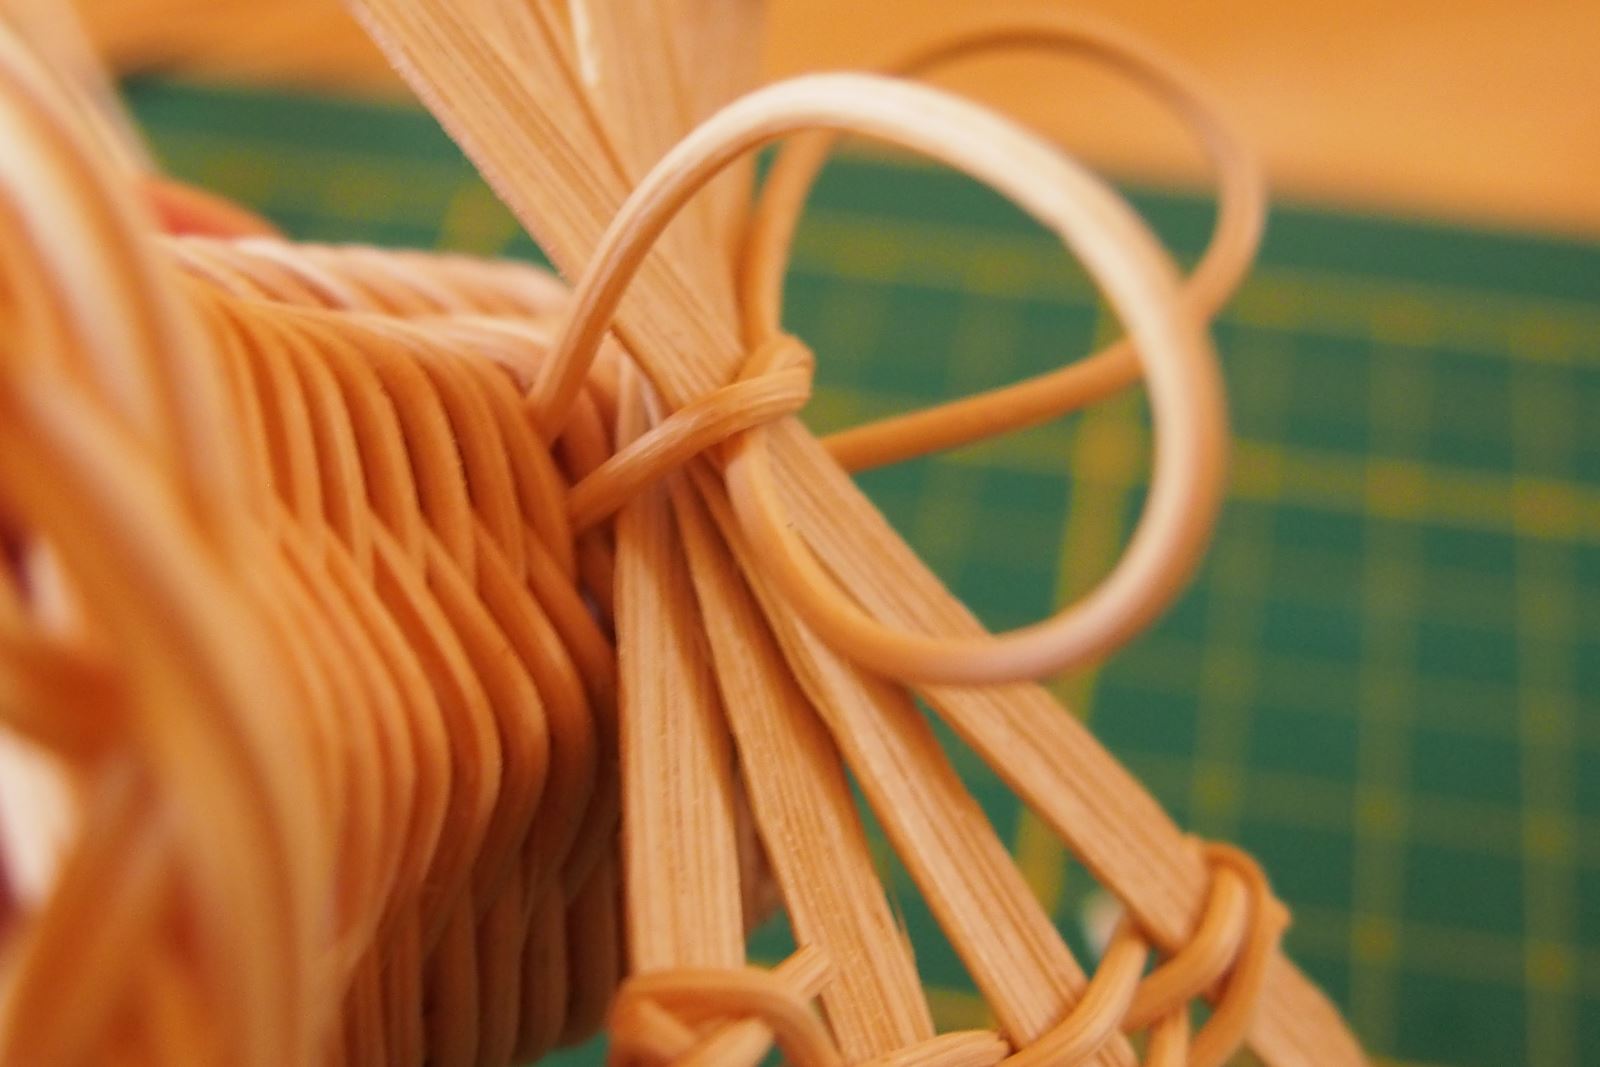
20. Attach the wings with another soaked twig. Make a gap between the twigs about five rows from the top. Put a twig through. 2 rows down, use the awl to make another gap and slide the other end out like in the last picture.
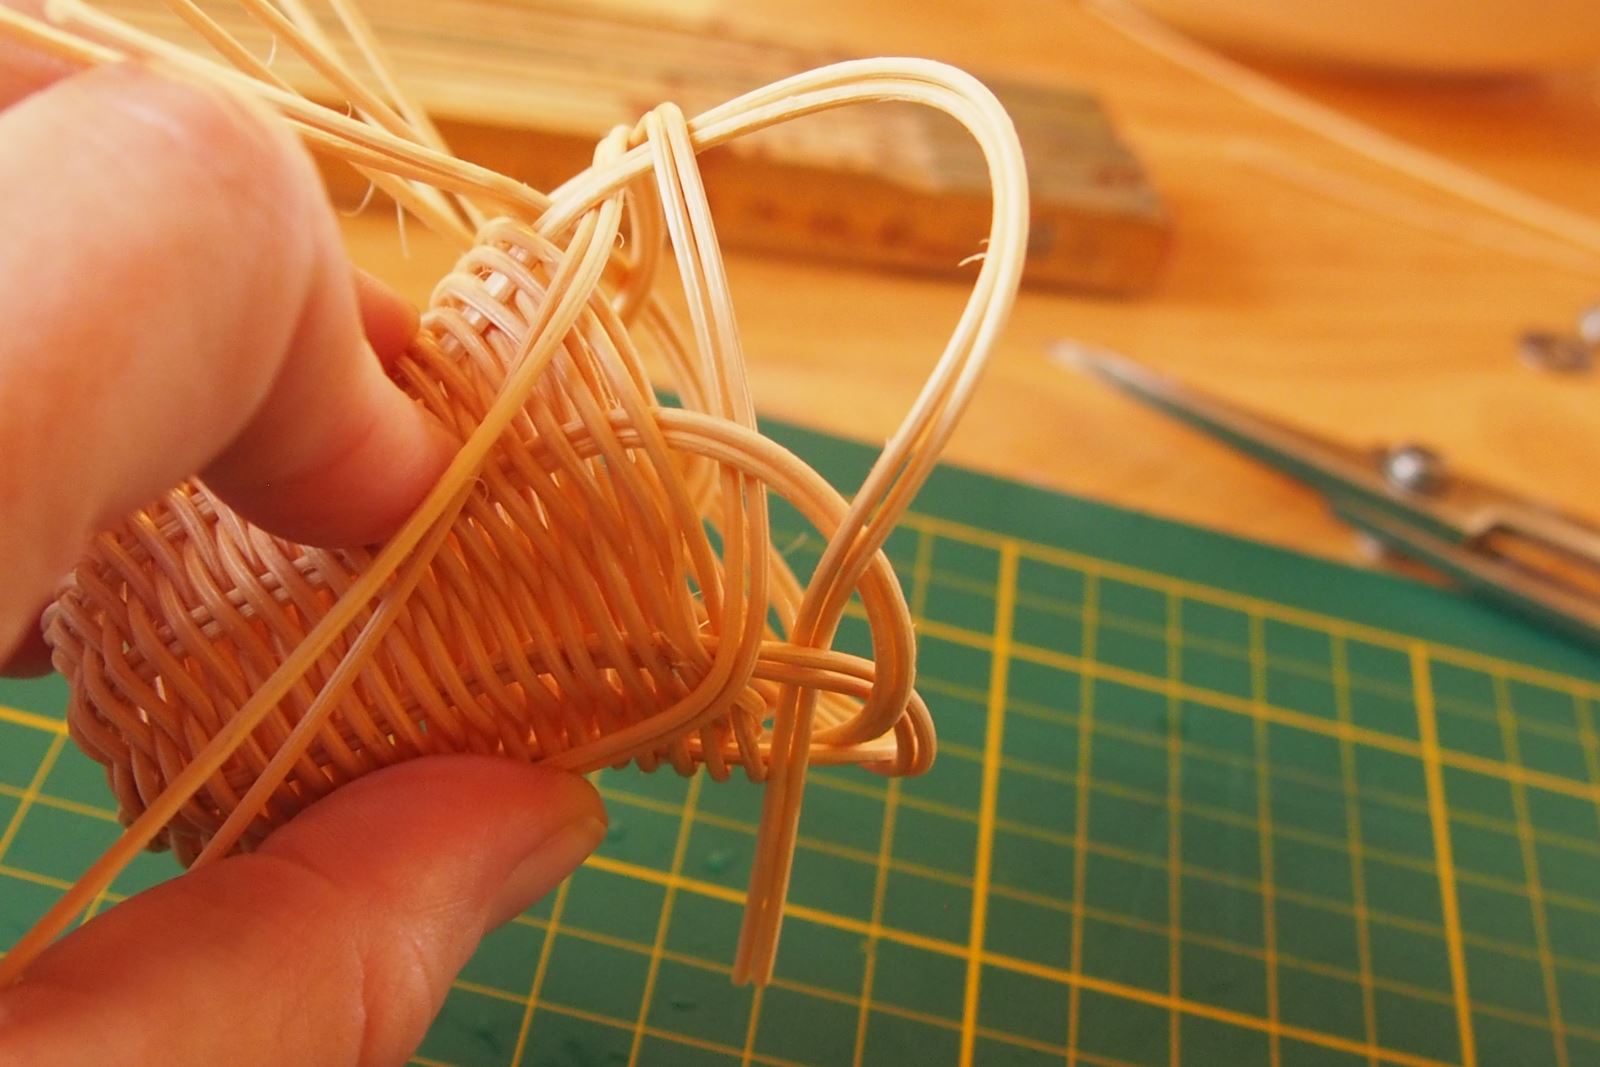
21. Place the wings round the side of the cane against the bell. Make a knot and tighten.
22. Tuck the ends inside the bell along the original twigs. Tighten and trim inside.
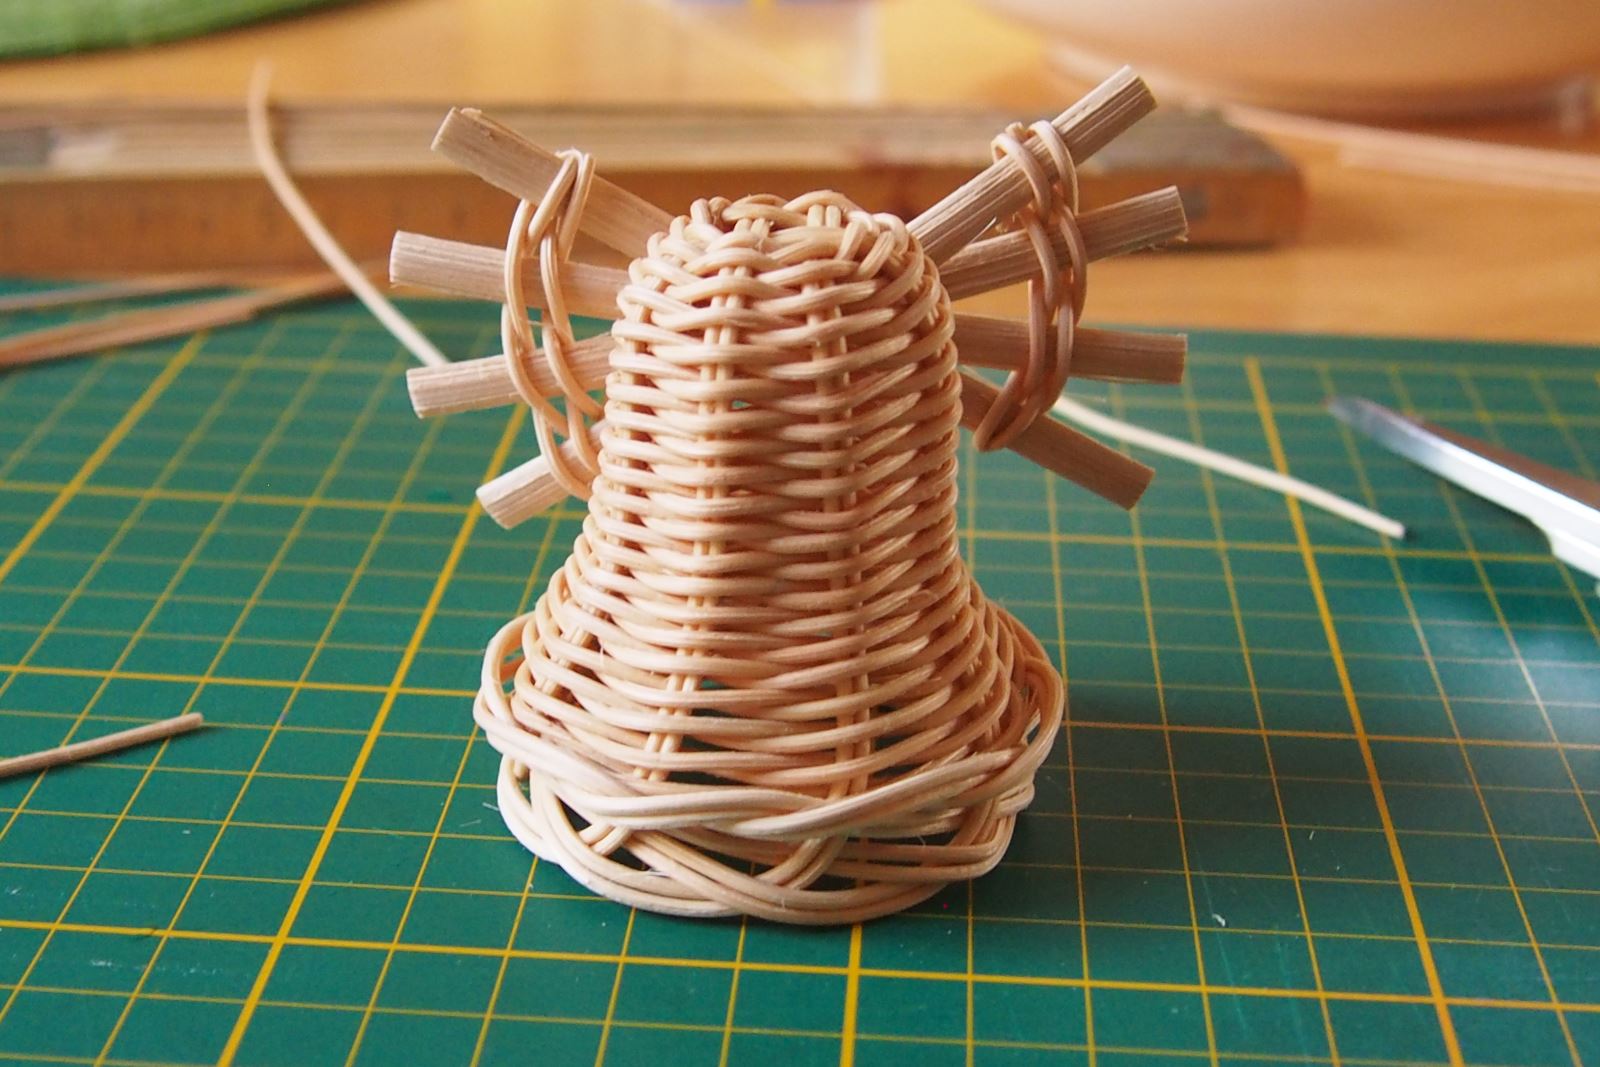
23. Here's a little angel with no head.
24. Prepare a ball, screw, string, glue and screwdriver for the head.
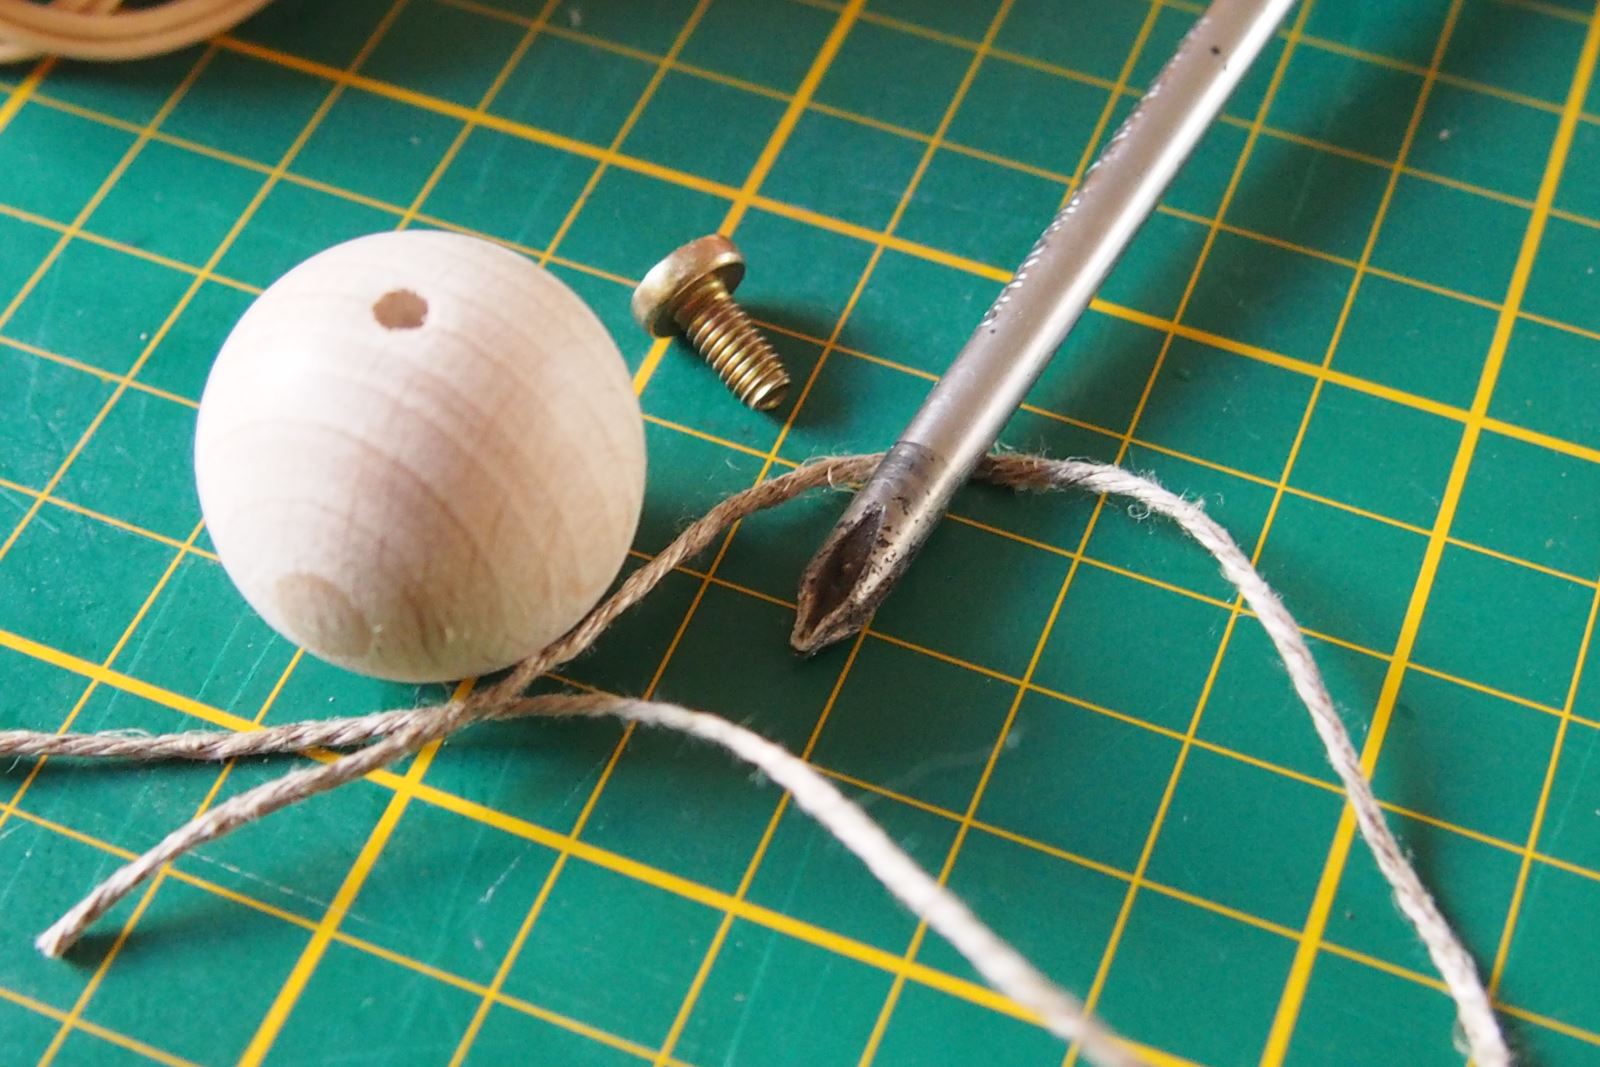
25. Fold the string in half and poke through the hole. Tie a knot at the bottom and put glue on it. Then pull the knot inside the ball.
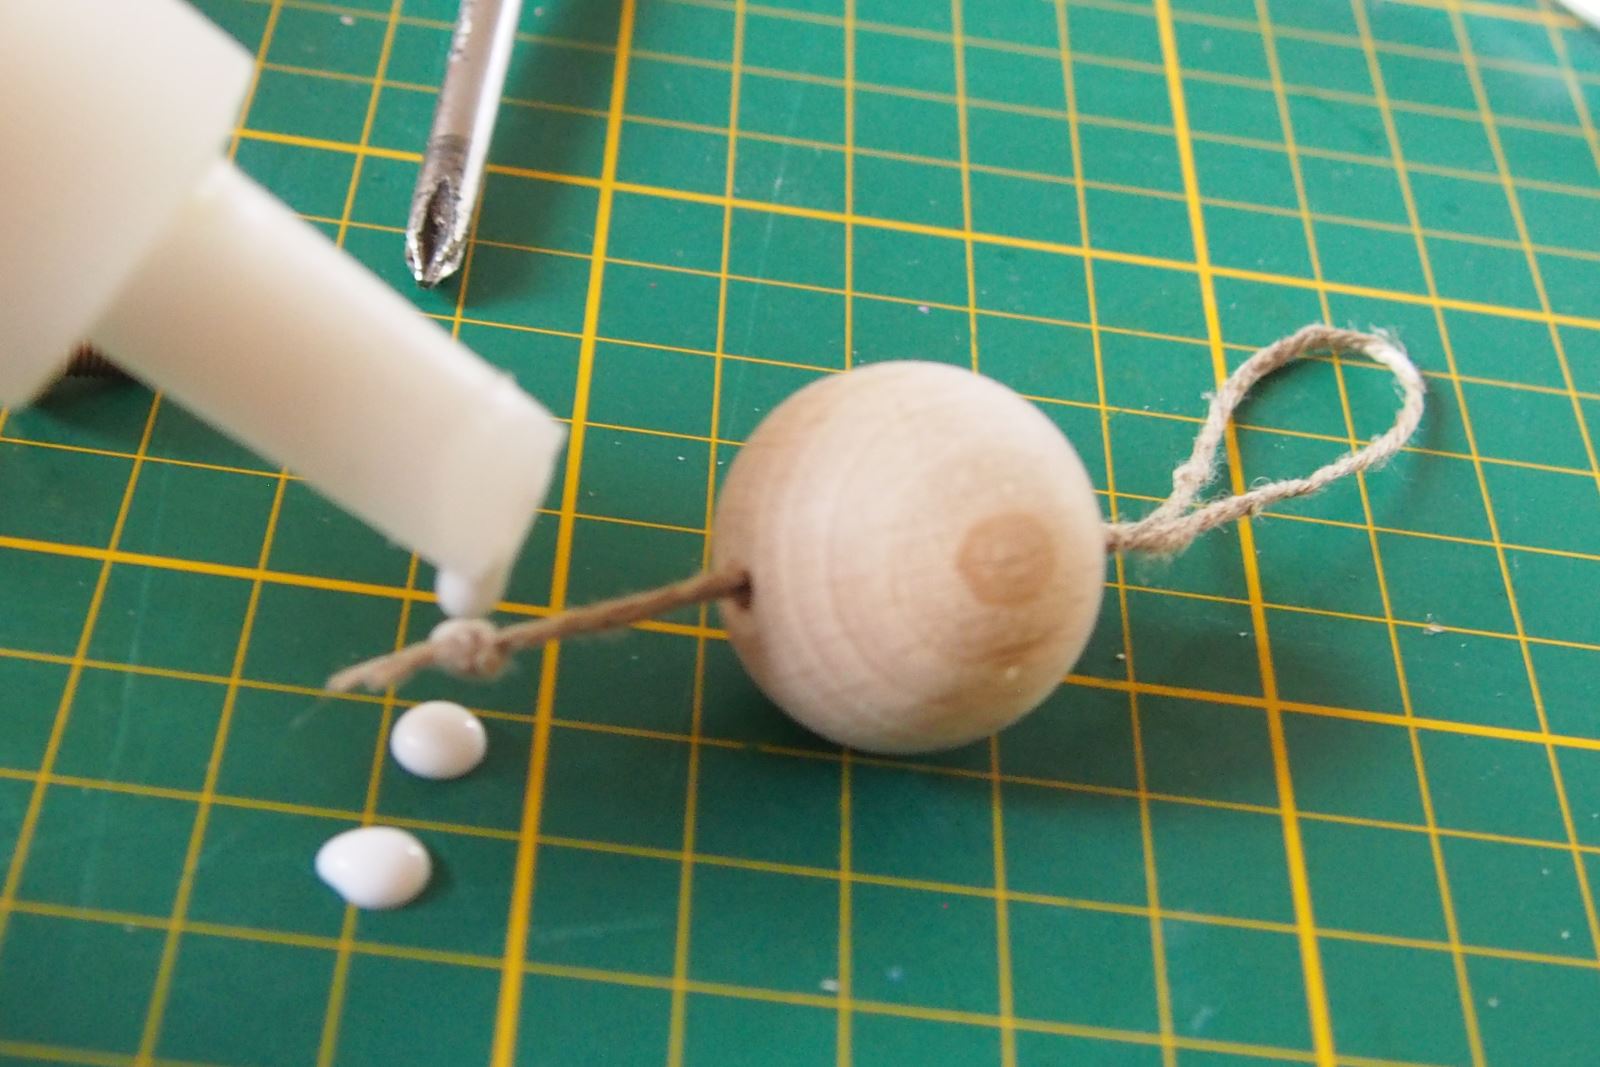
26. Insert the screw from inside and screw the head on.

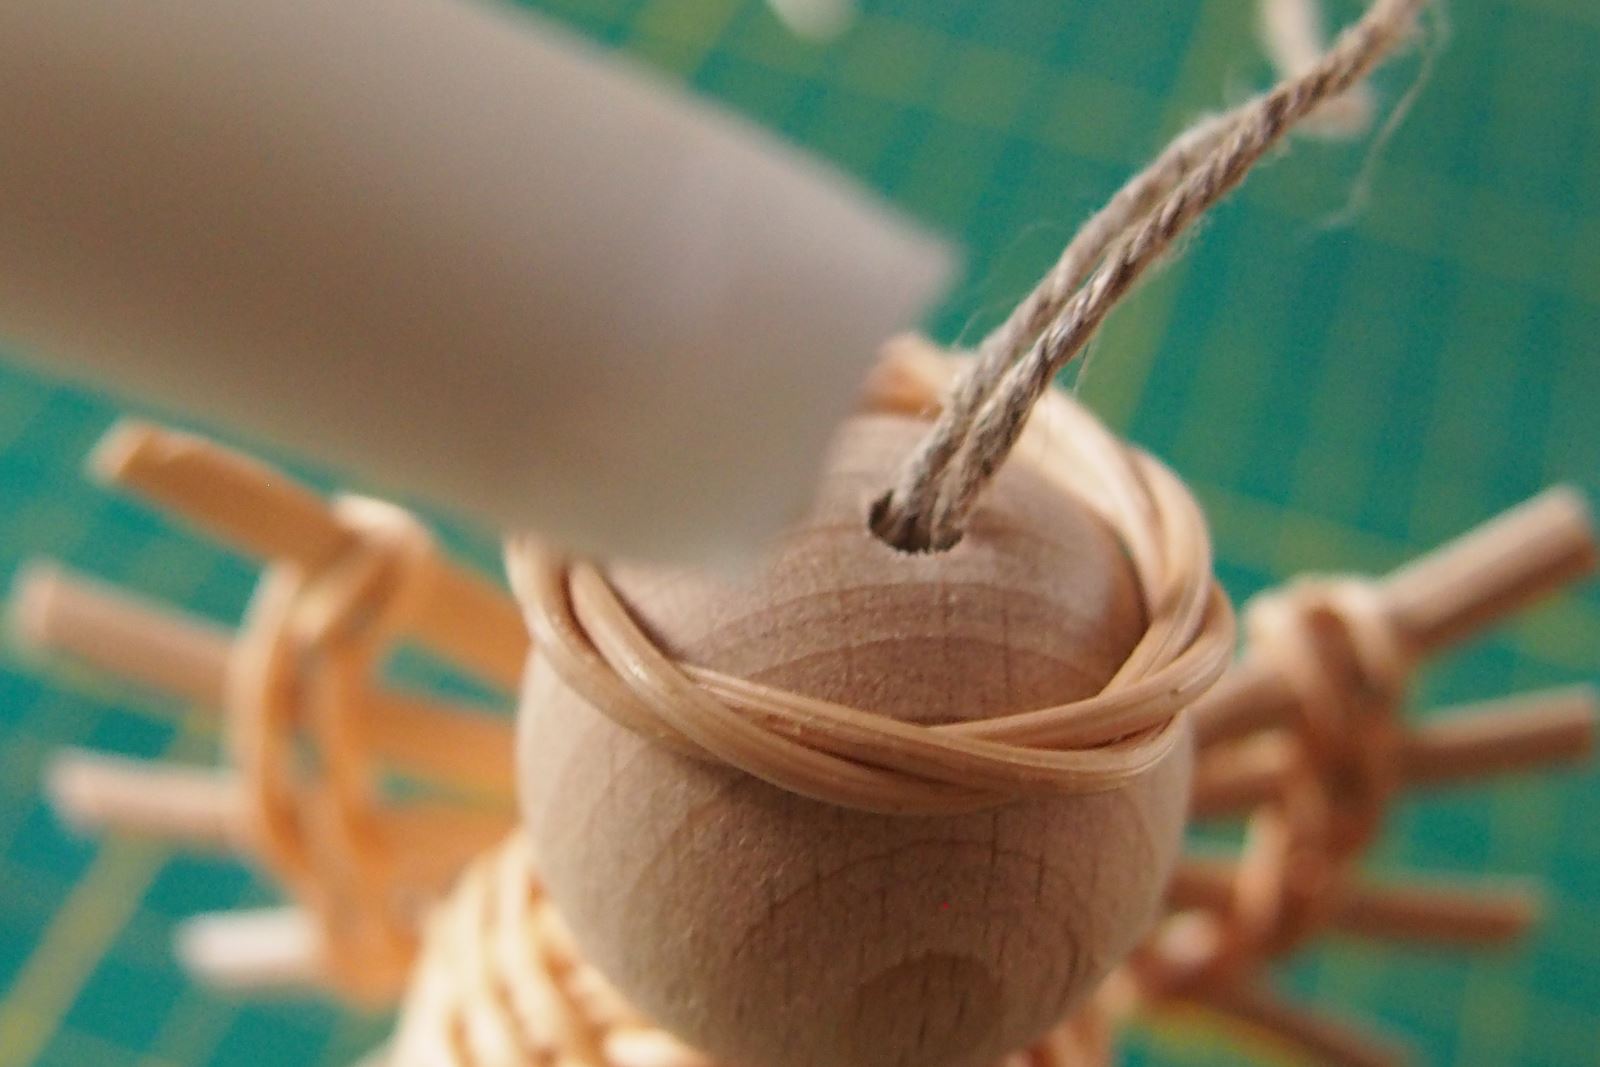
27. Finally, make a tiny wreath and stick it on the head.
28. Let the angels to dry well.
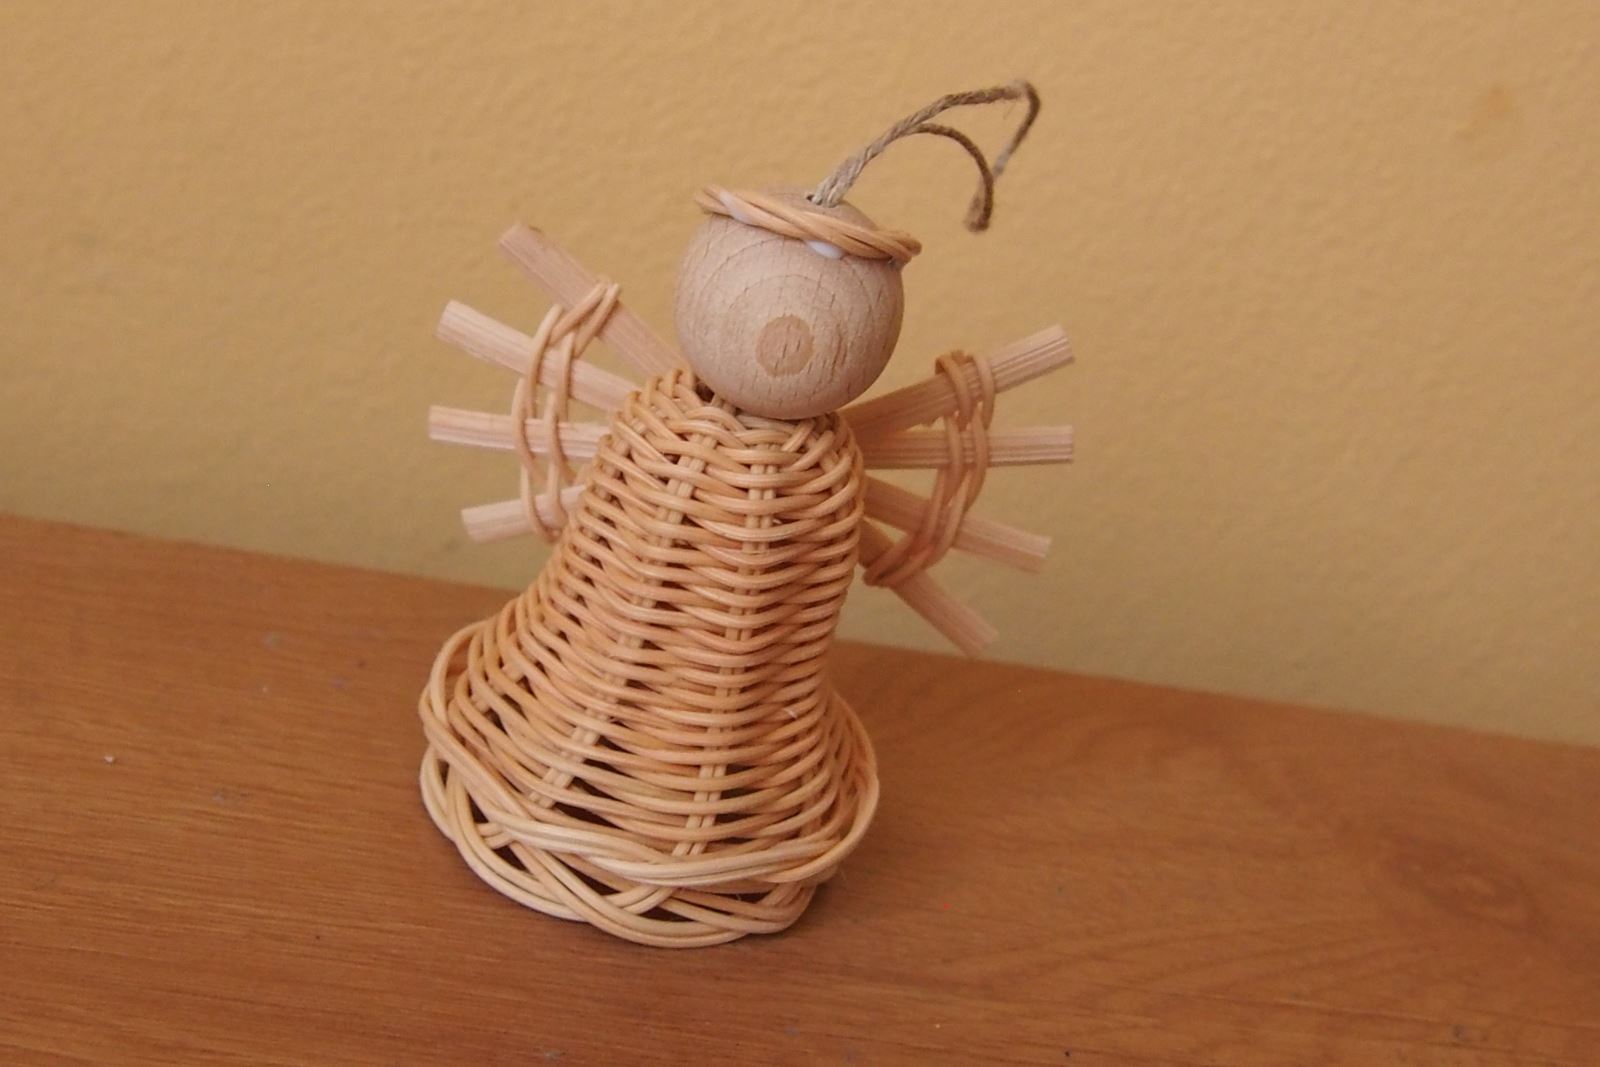
The angel belongs to Christmas and I hope you managed to weave the angels according to the instructions.
Advices and tips:
- Use a dyed rattan on the ribs (8 basic twigs). Angel's bottom hem will be colored.
- Got a bigger mold? Never mind, only the angel will be a little bigger. In that case, get an appropriately large ball for your head, weave longer wings. If it is a significantly larger mould, choose a stronger rattan (2 mm).
- Hang the angels in a wreath. It'll look nice in a window.